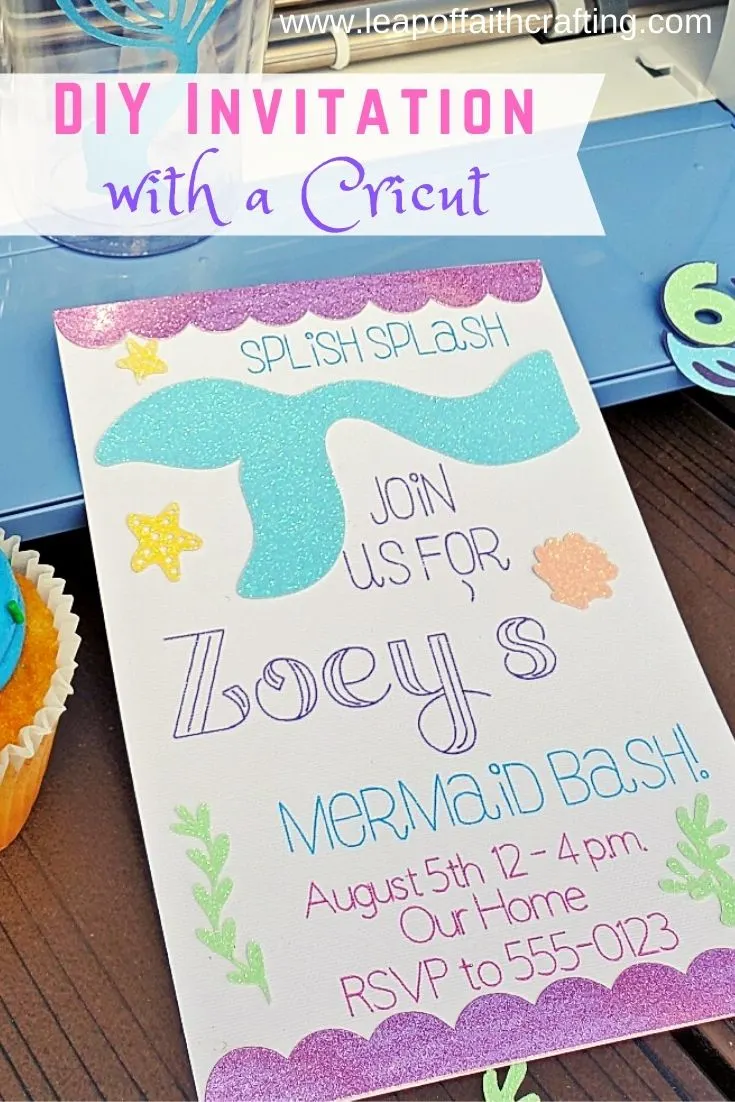
Learn how to make custom Cricut invitations by using the draw and cut function. Perfect for a birthday party like these mermaid invitations!
Are you a mermaid fan or have a little one that is? If you answered yes to either question, then I’m sure throwing a cute mermaid party is high on your list!
A few weeks ago, I posted a video over on my YouTube channel on how to make three easy mermaid birthday party crafts with a Cricut and one of them was these cute Cricut invitations.
I wanted to go a little more in-depth on how I designed these using the write and cut function in written form in case that helps some of you visual learners;)


I am a huge fan of glitter, so of course I had to use glitter materials to make them including glitter cardstock and glitter gel pens. The more glitter the better for me!
Materials Needed for Cricut Invitations
Disclosure: This post contains affiliate links from Shareasale, Cricut, Awin, CreativeFabrica, and Amazon.com. I receive a small commission at no cost to you when you make a purchase using my links (purple text). As an Amazon Associate, I earn from qualifying purchases.
- Cricut cutting machine – I used my Cricut Explore Air 2
- cardstock for invitation – I used Cricut white cardstock
- glitter cardstock for cut out images
- Cricut glitter gel pens or other pens (on Amazon here)
- glue stick or double sided tape
Designing Cricut Mermaid Invitations in Design Space
Part of this process is in the YT video at the bottom of this post so make sure to check it out to see the steps in action!
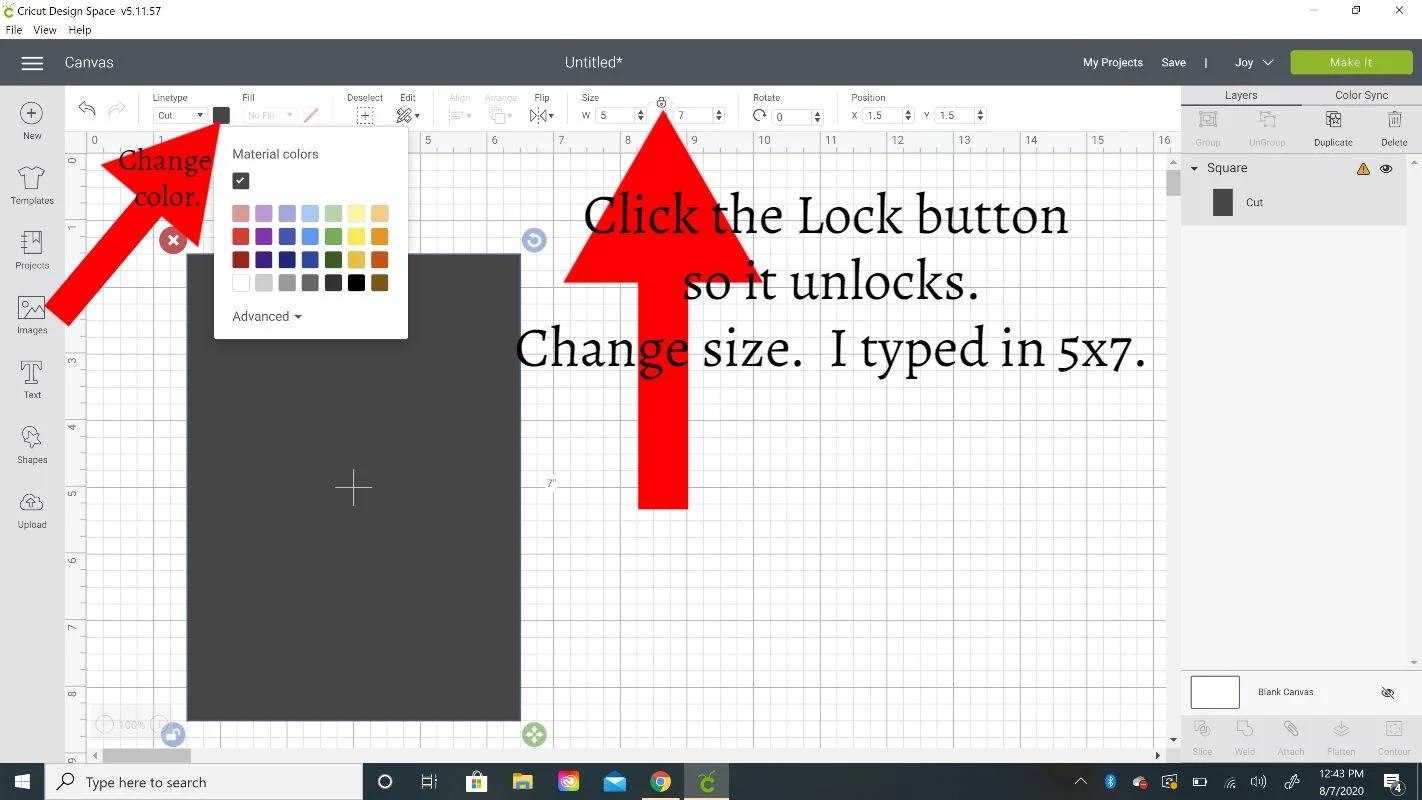
The first thing you’ll need to do is insert a rectangle the size you want your invitation to be. I wanted mine to be 5×7.
I clicked on Shapes on the side panel and chose a square. Then I unlocked the size proportion and typed in 5 and 7 for width and height. Then I changed the color to white.

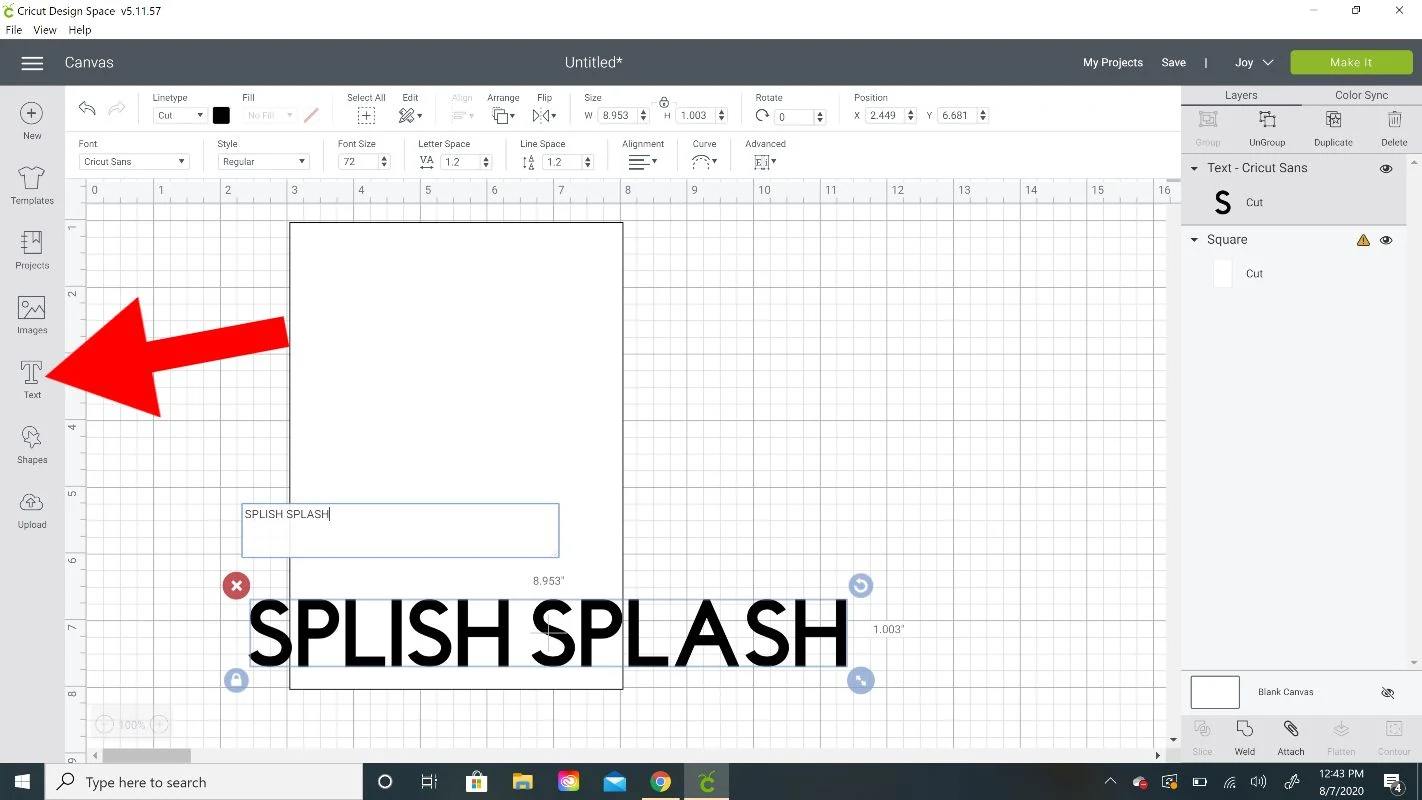
Then you’ll need to add text boxes. Click on Text and add whatever you want it to say. I typed in “Splish Splash”.

Then you’ll want to find a writing font. Click on the Font drop-down menu at the top left and then click on Filter at the top right of the pop-up box. Select Writing.
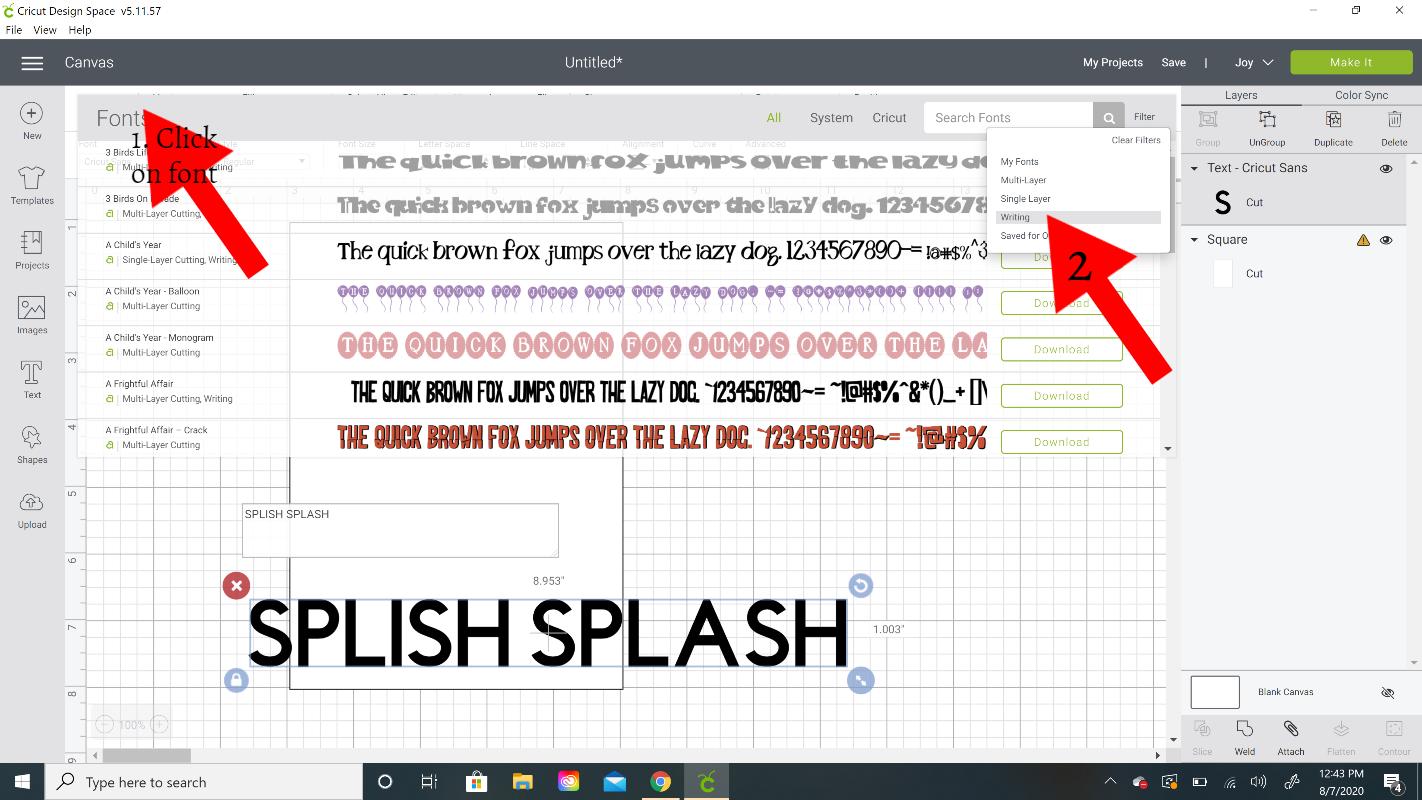

Scroll through the writing fonts and pick which one you want to use. If you have Cricut Access you will have a lot to choose from. If you don’t, the selection is probably limited. I used Lemonade font.
Then use the double arrow button to size to fit on your invitation.
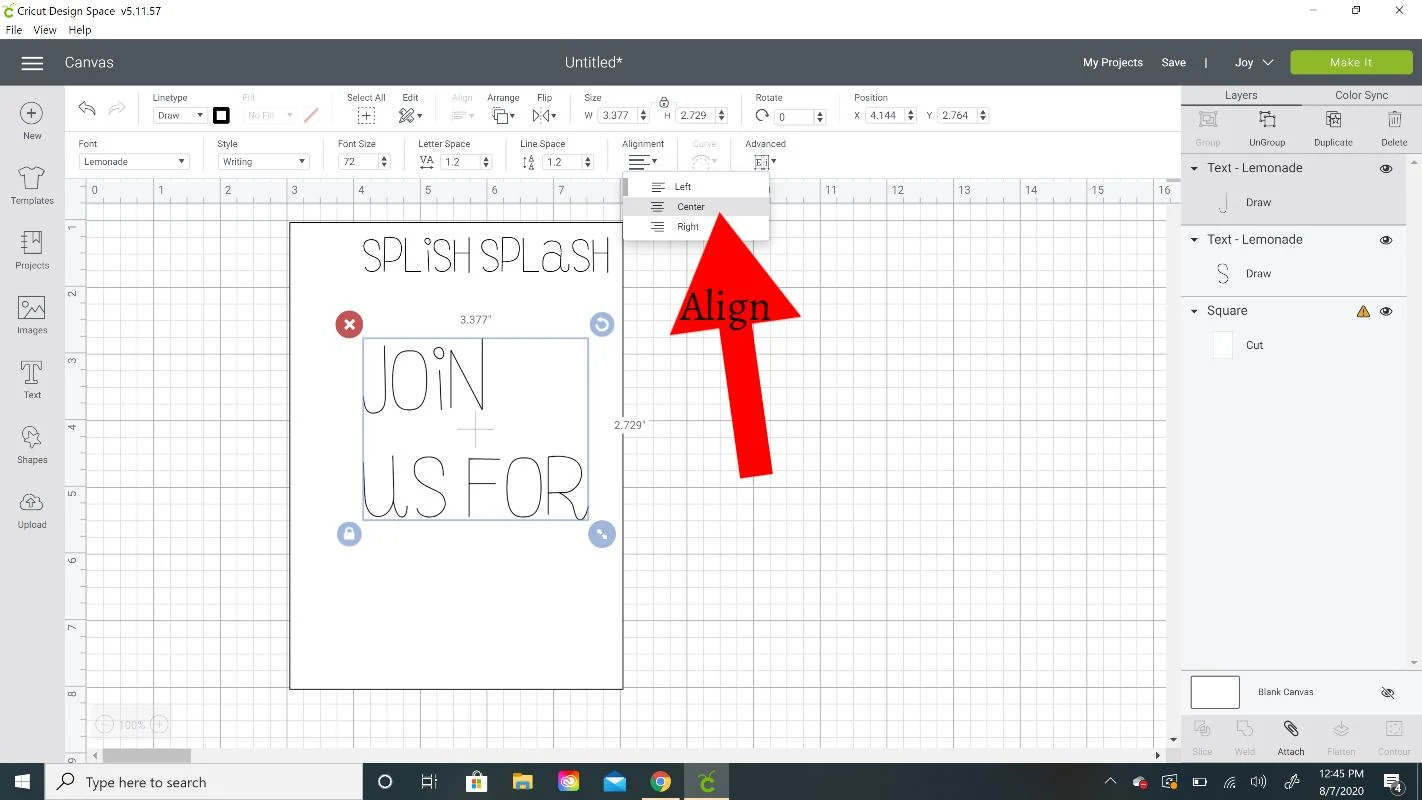
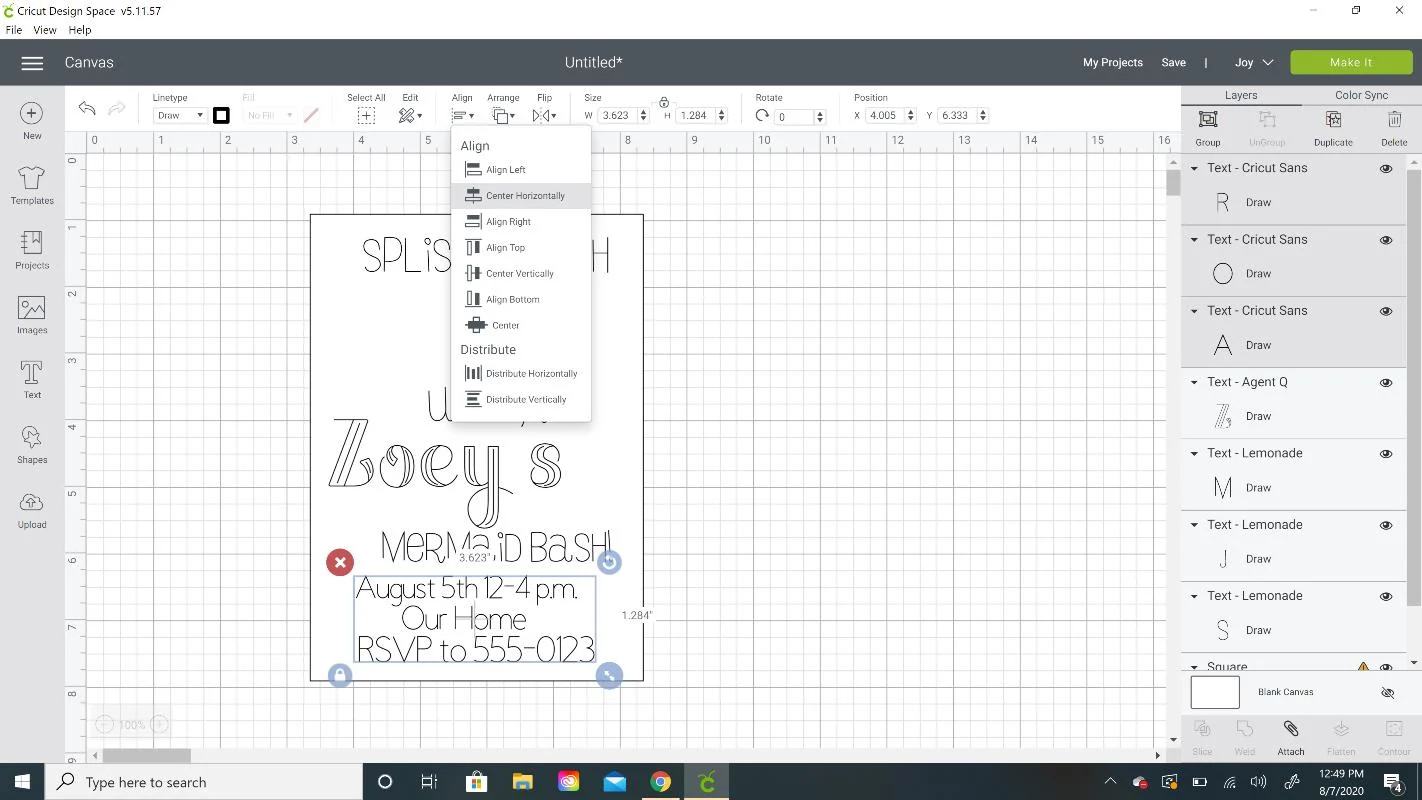
Keep inserting text boxes and typing what you want the invitation to say. You can select different fonts or use all the same. I used Agent Q for Zoey and Cricut Sans for the address.
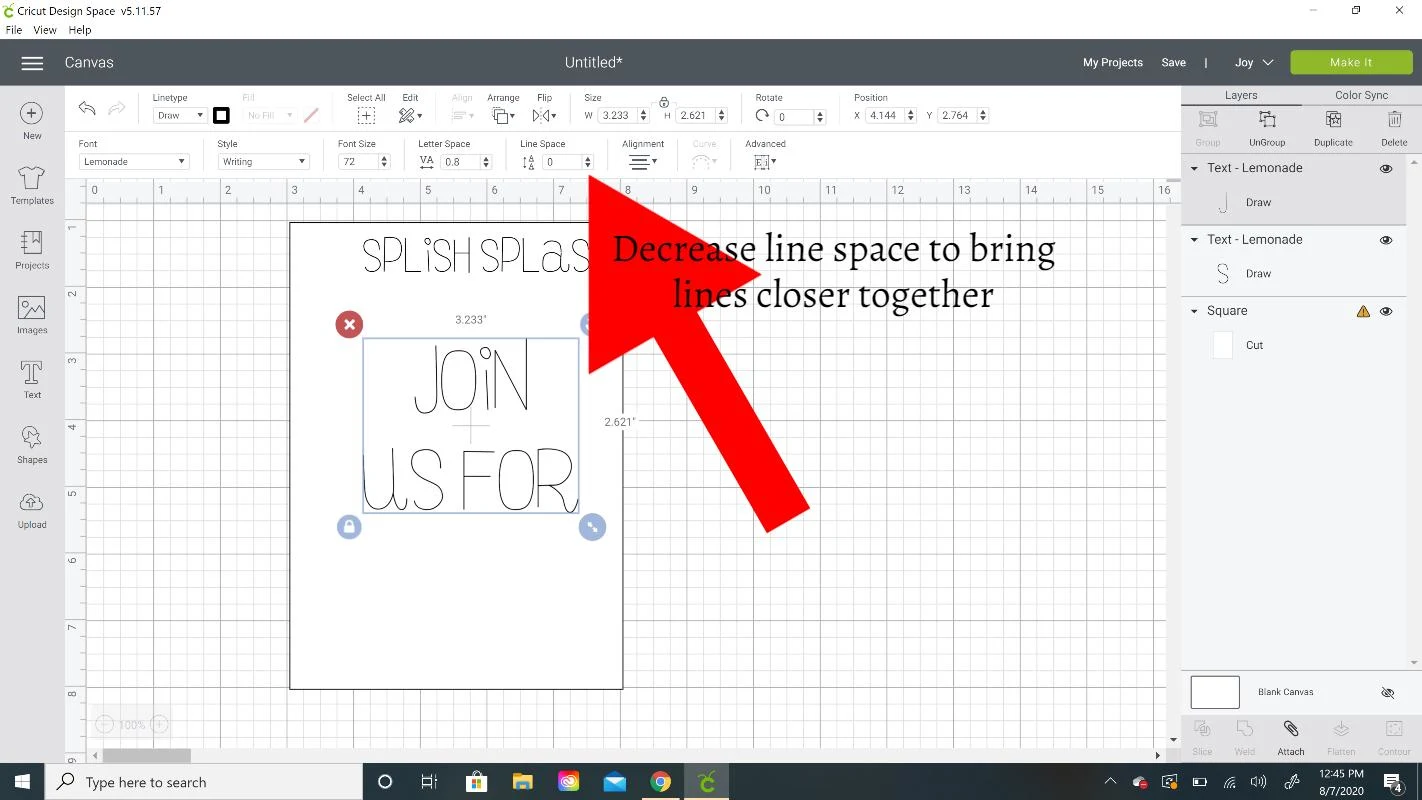
If you insert multiple lines in one text box you can use the Alignment drop-down to center the text and also the Line Space to move the lines closer together.


Adding Mermaid Images to Invitation
Ok, so now we need to add some cute mermaid images that we will cut out of glitter cardstock to the invitation.
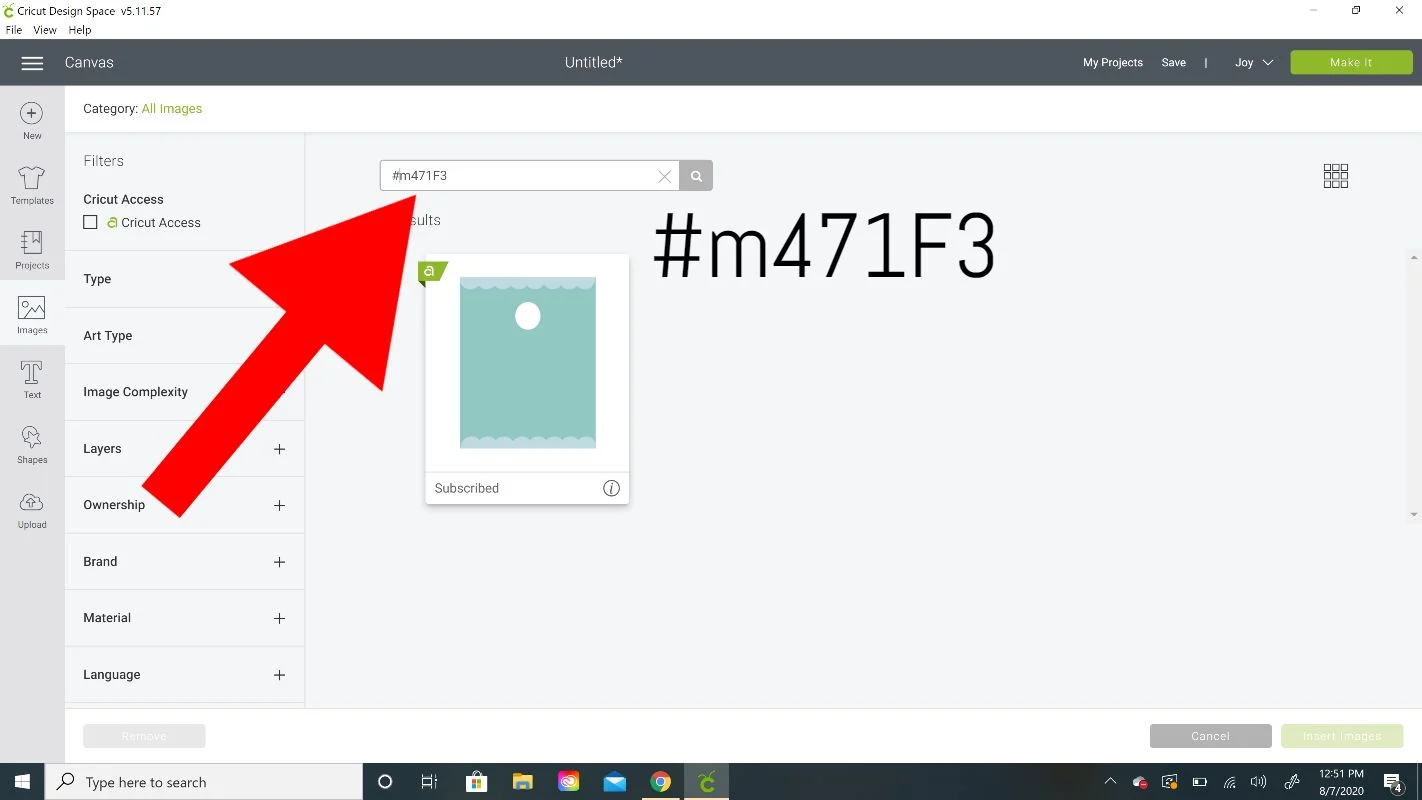
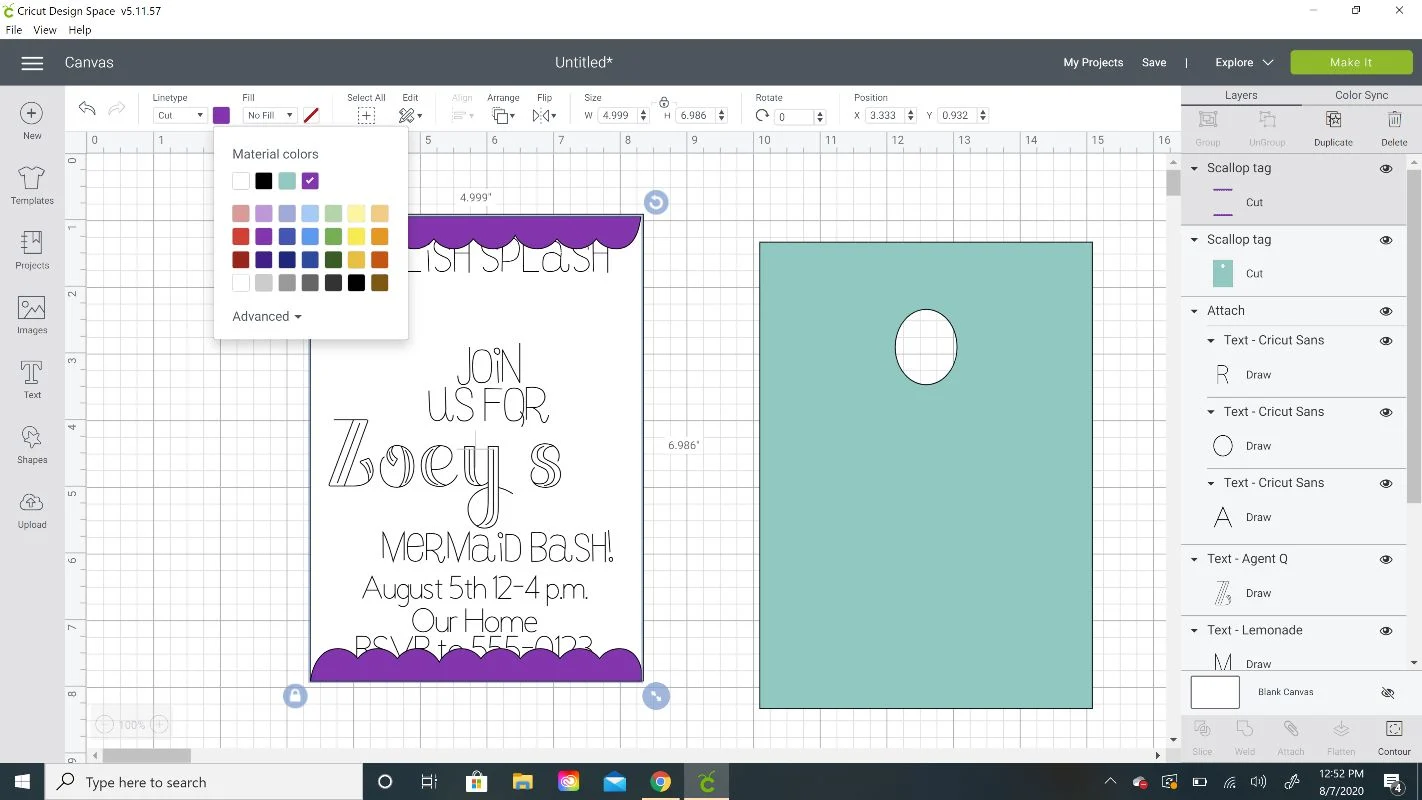
Click on Images on the left column. The first thing I added was the scalloped trim for the top and bottom. If you’d like to use this also, type #m471F3 into the search bar and insert it.

Change the size to 5×7 and then Ungroup the image. Move the scallop trim over to the invitation. Delete off the background part of the scalloped image.

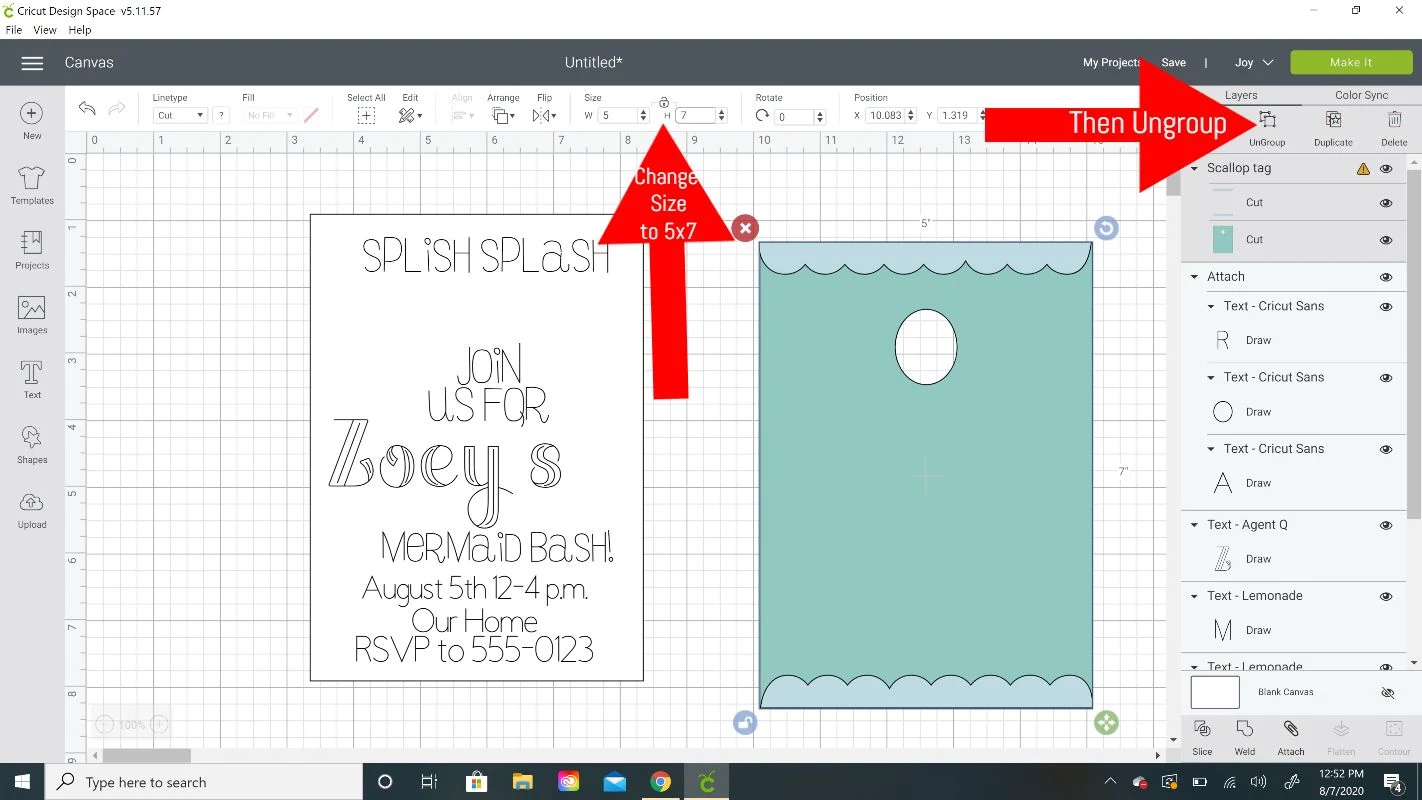
Change the color to what you’ll cut out so you can see what it will look like! You also might need to move or resize some of the text boxes so they fit with the scallops in place.

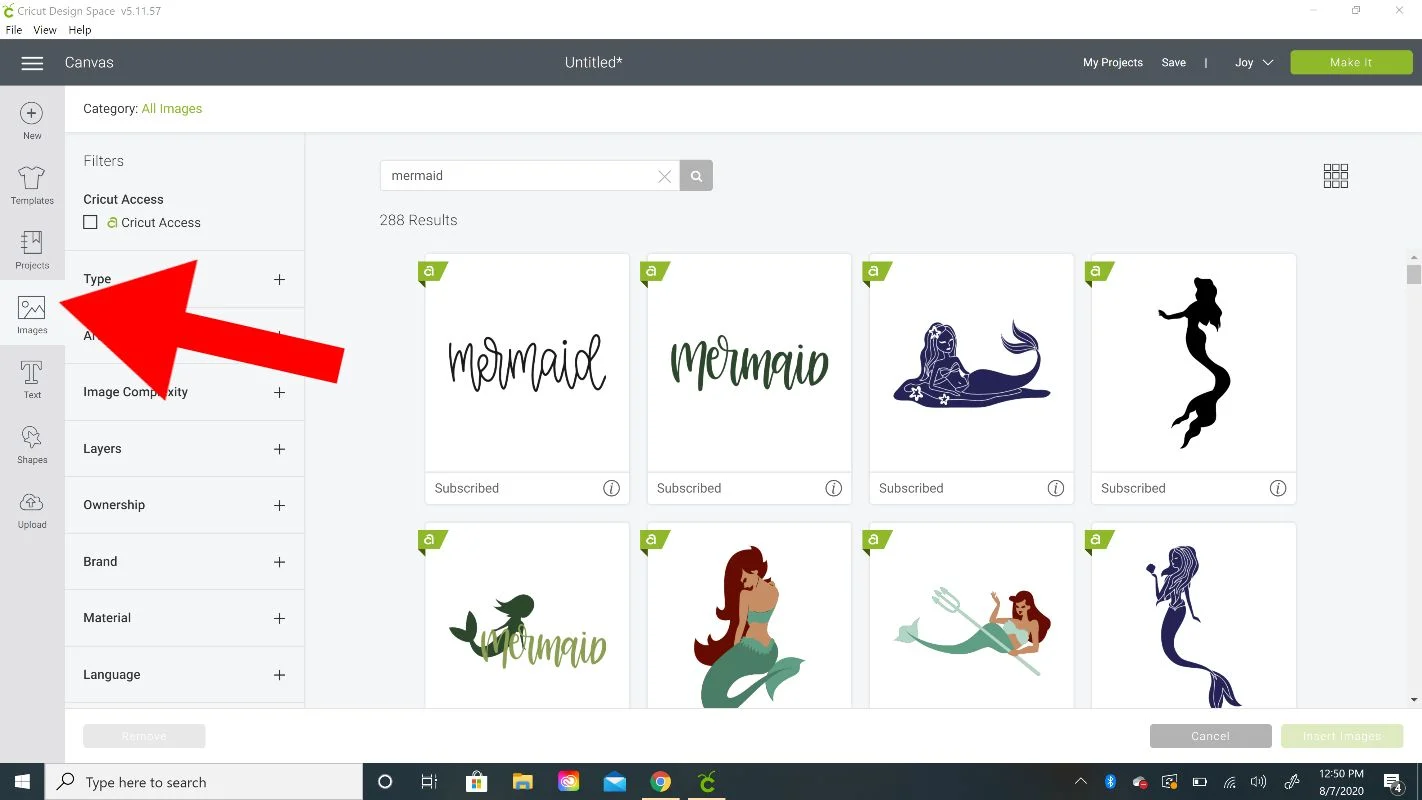
Then I clicked on Images again and typed mermaid into the search box. I scrolled through and found some images I wanted to use. Find whichever ones you like best!

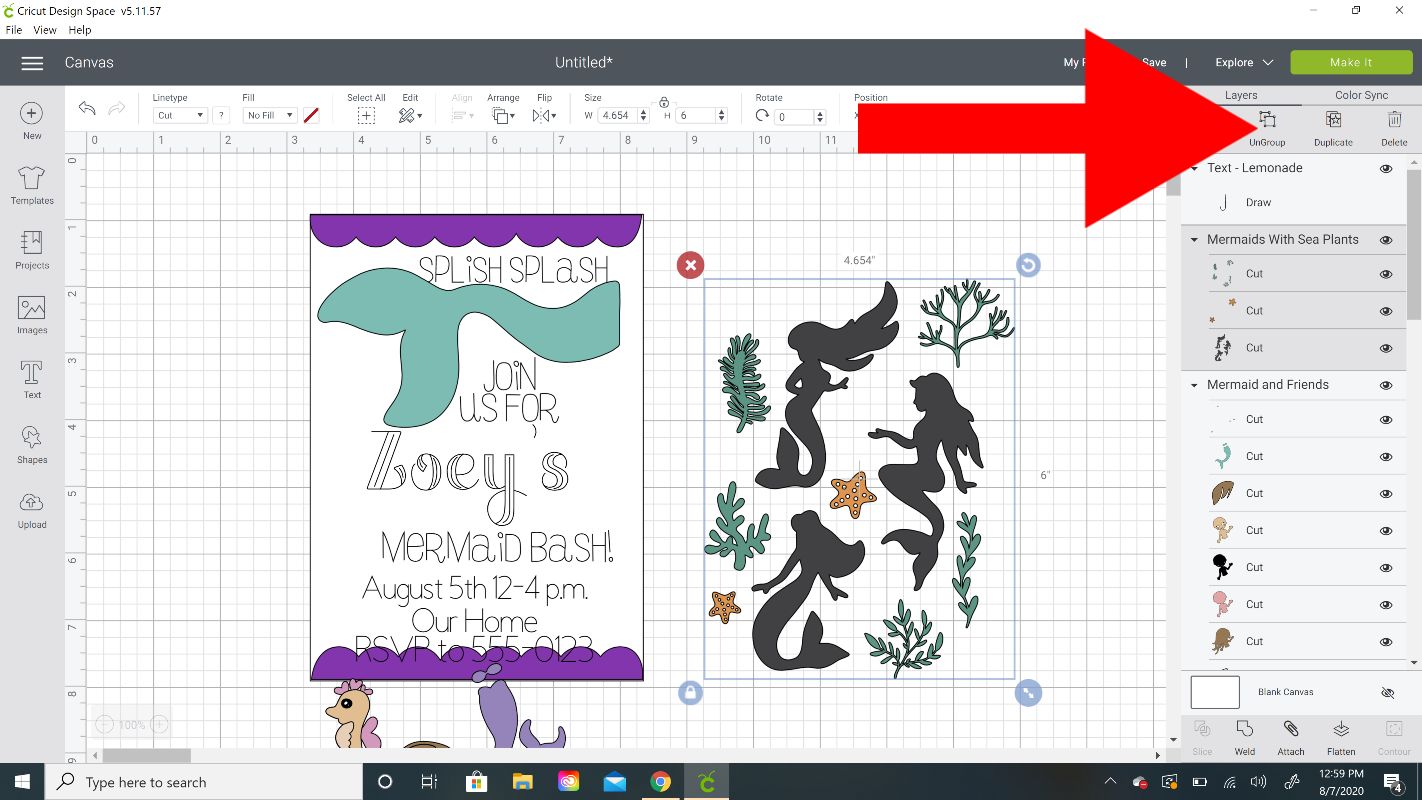
For the plants, I found a grouped image and inserted the entire group. These are some of the same images I used for the cupcake toppers.

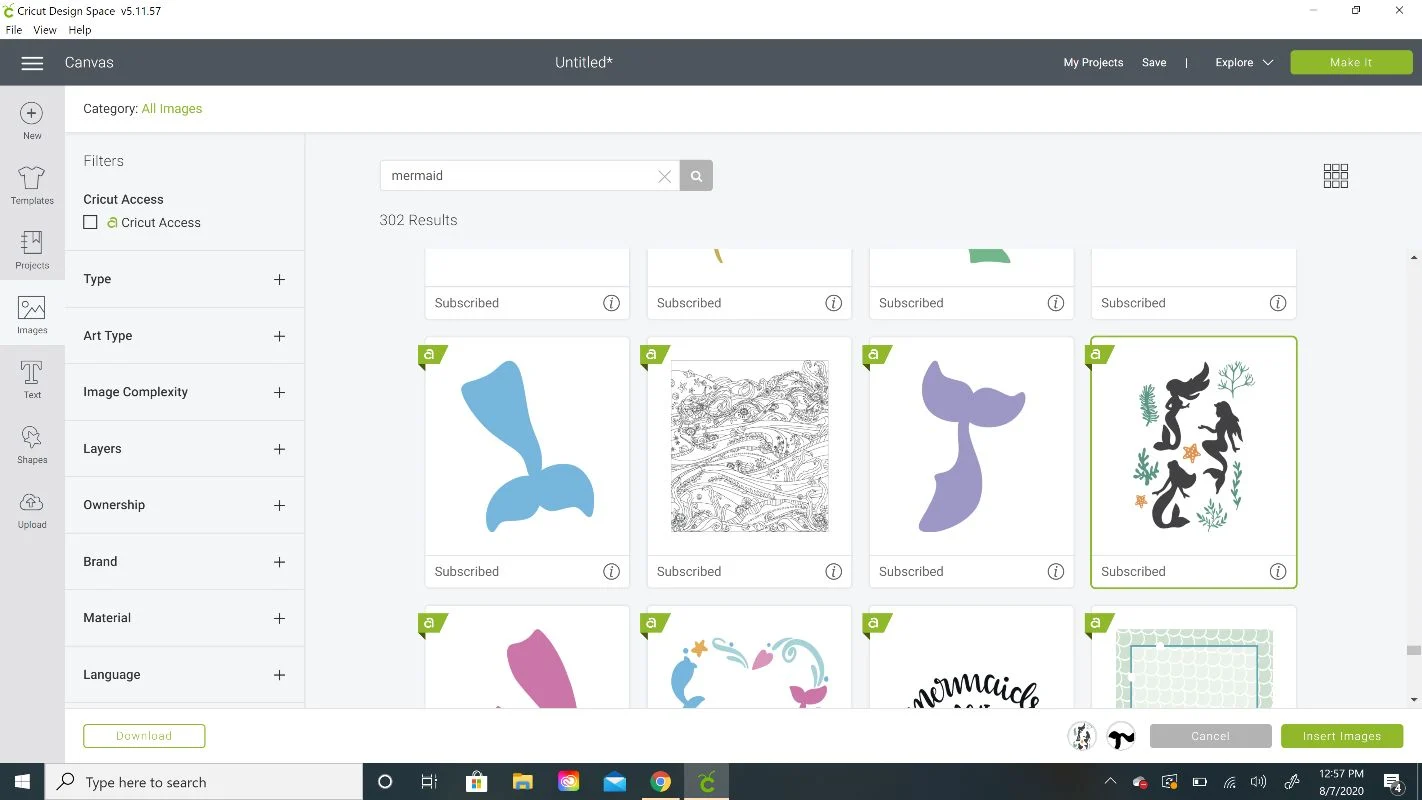
These are all the images I found to use. You can change the color of the mermaid tail and size it to fit in between the text.

I only wanted two of the of the plants from this image set so I Ungrouped the file first and then deleted off the mermaids.

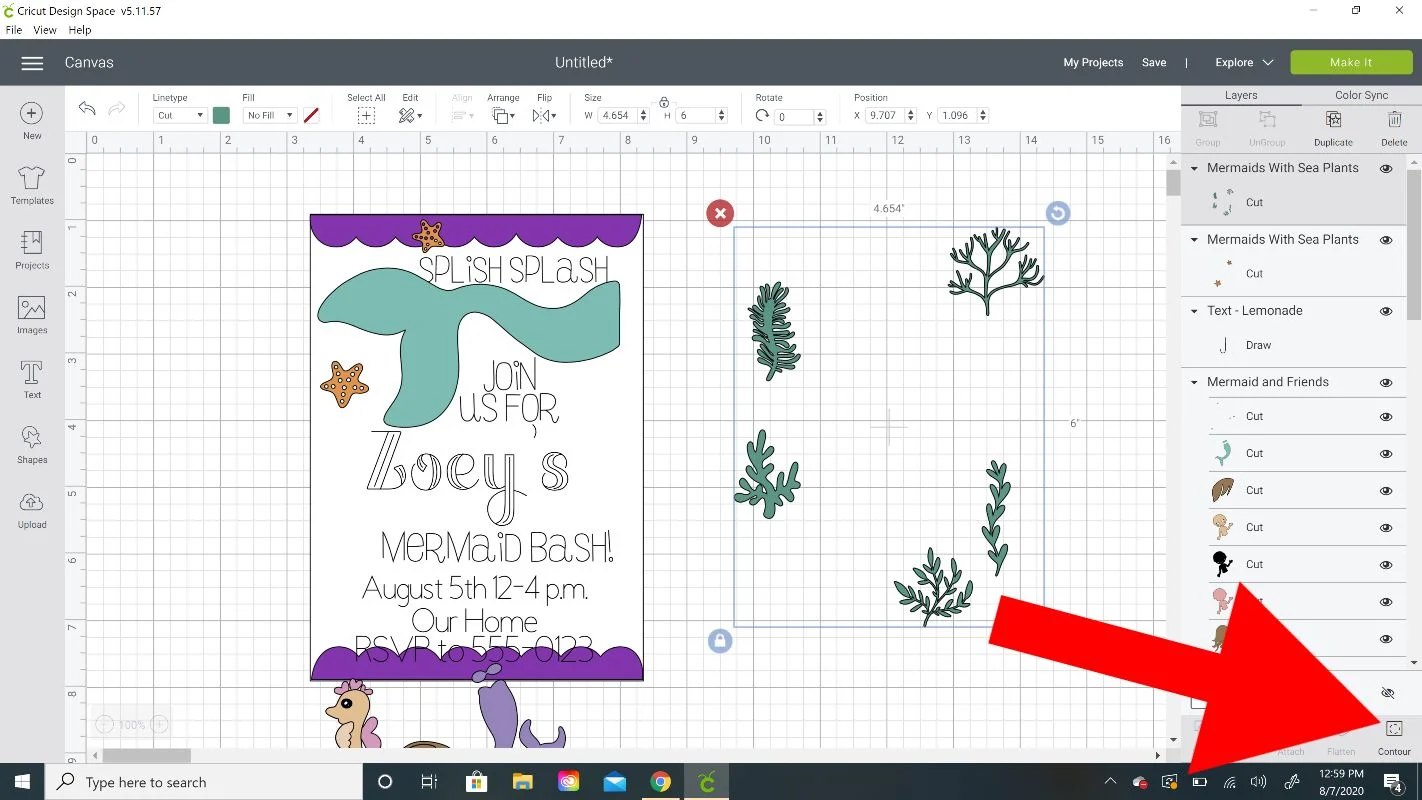
I used the starfish but I only wanted two of the plants so I used the Contour tool. But first I duplicated the file because I wanted to be able to move them separately.

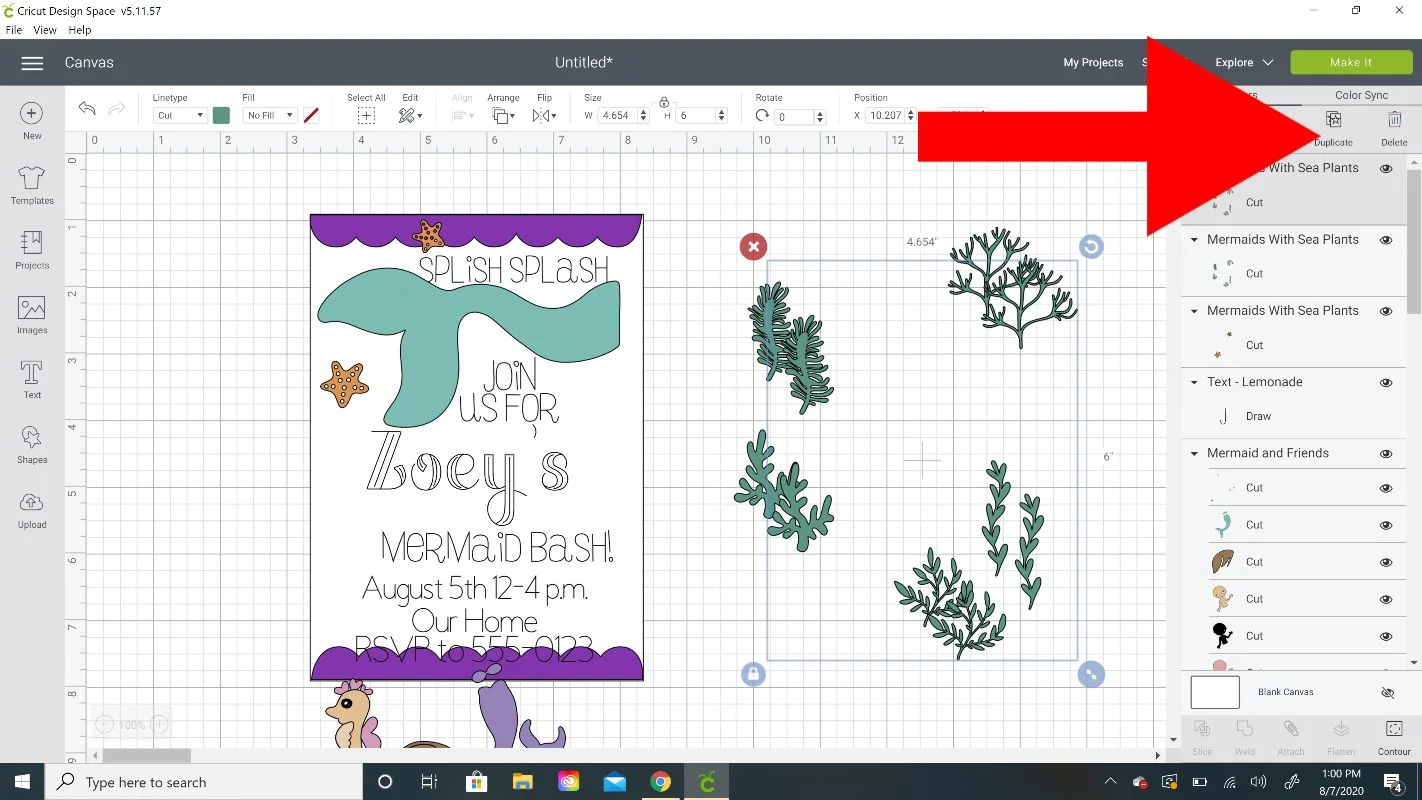
Then I clicked on one of the sets and clicked on Contour in the lower right hand corner.

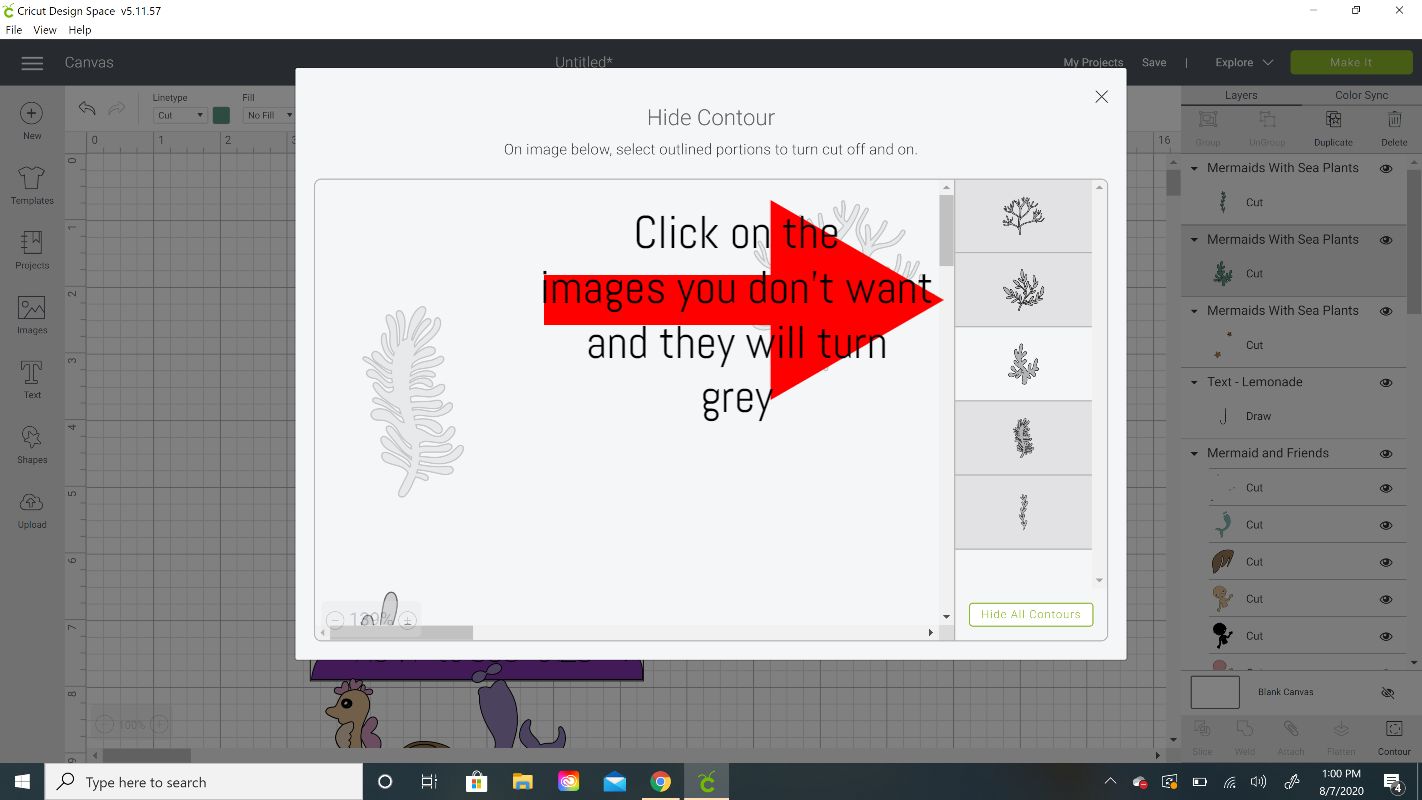
A popup box will appear. I find it easiest to just click on the images you don’t want on the right panel (they will turn grey). Then repeat the same process with the other image set but select a different plant to remain.
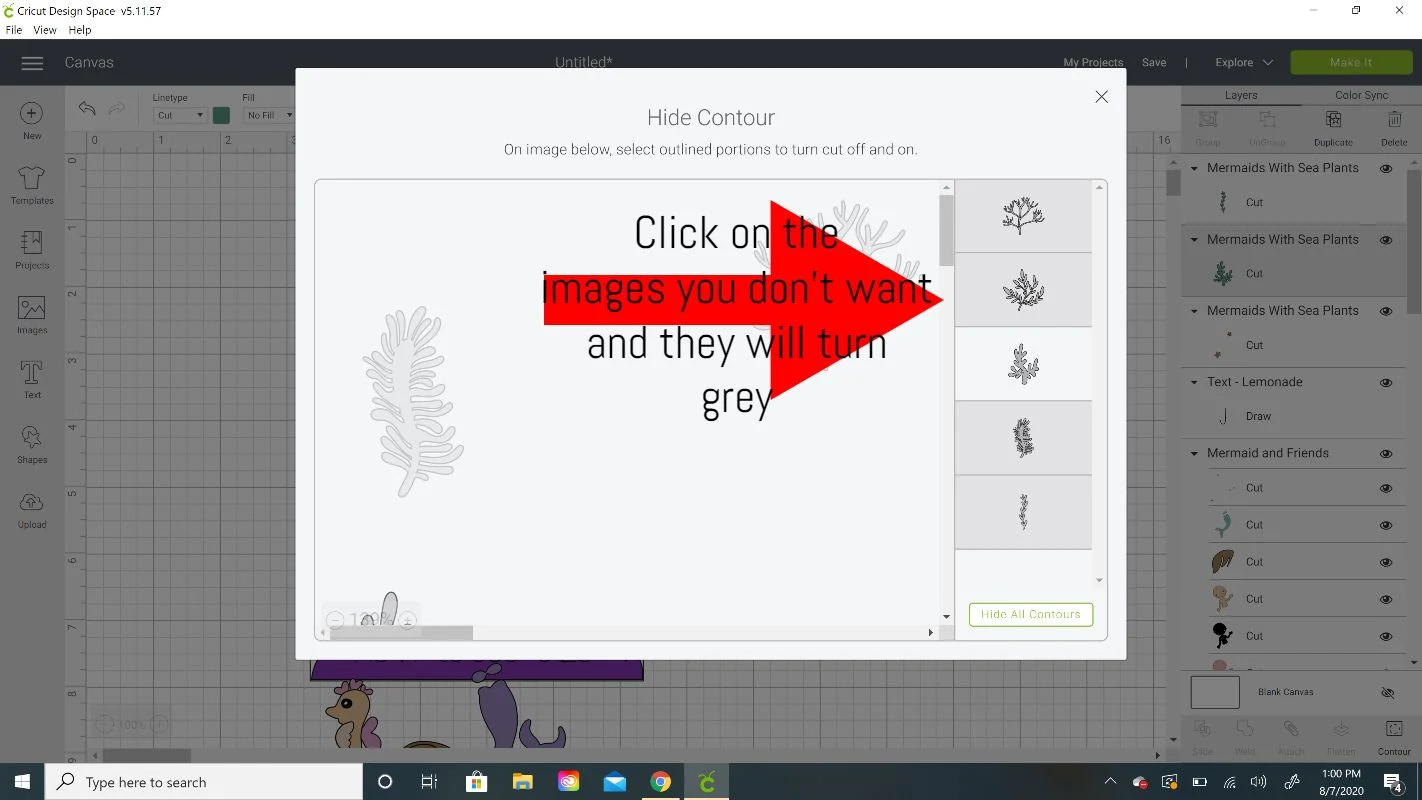
For the little shell, I was able to just Ungroup the set and delete all the other images except the shell.

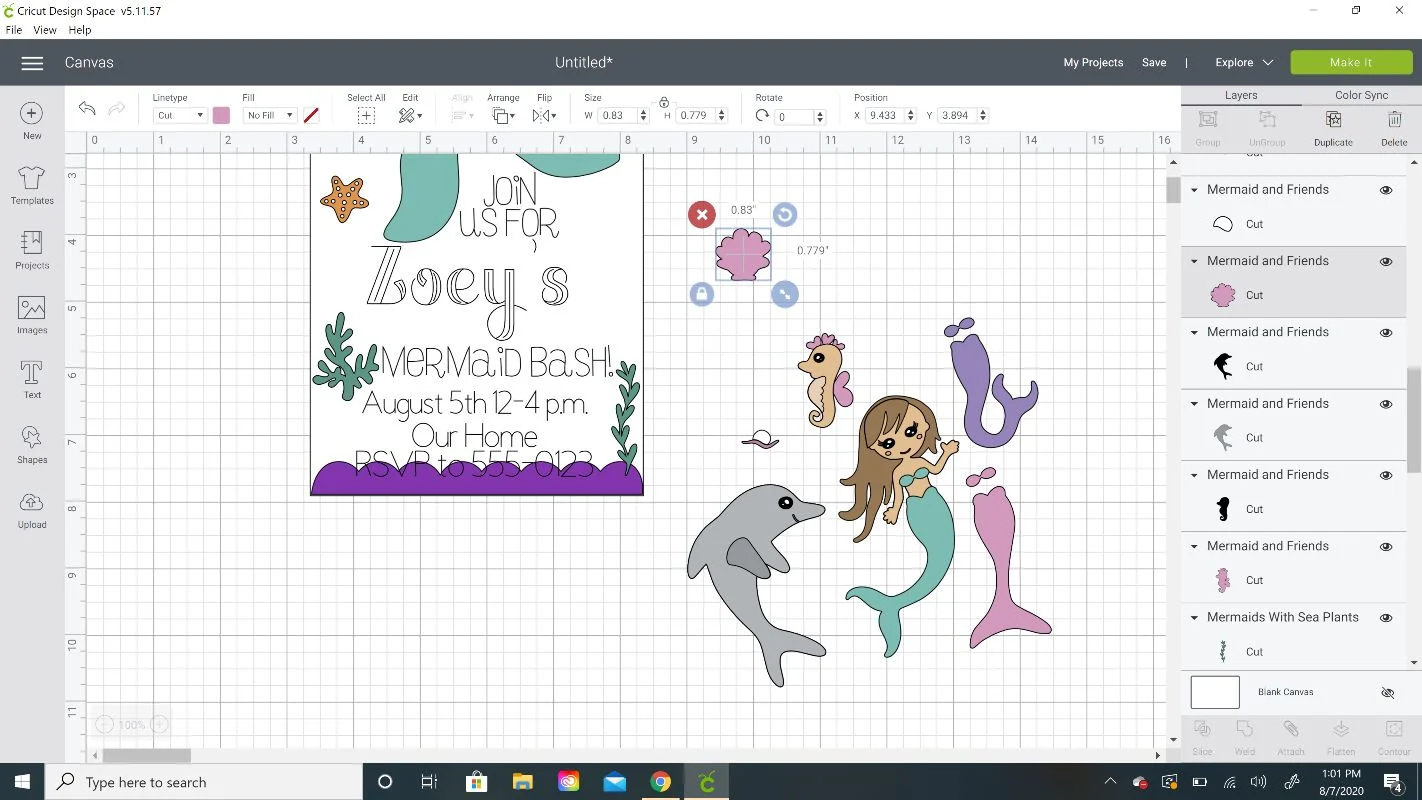
Size everything to how you want it and move the text around until it’s centered where you like.
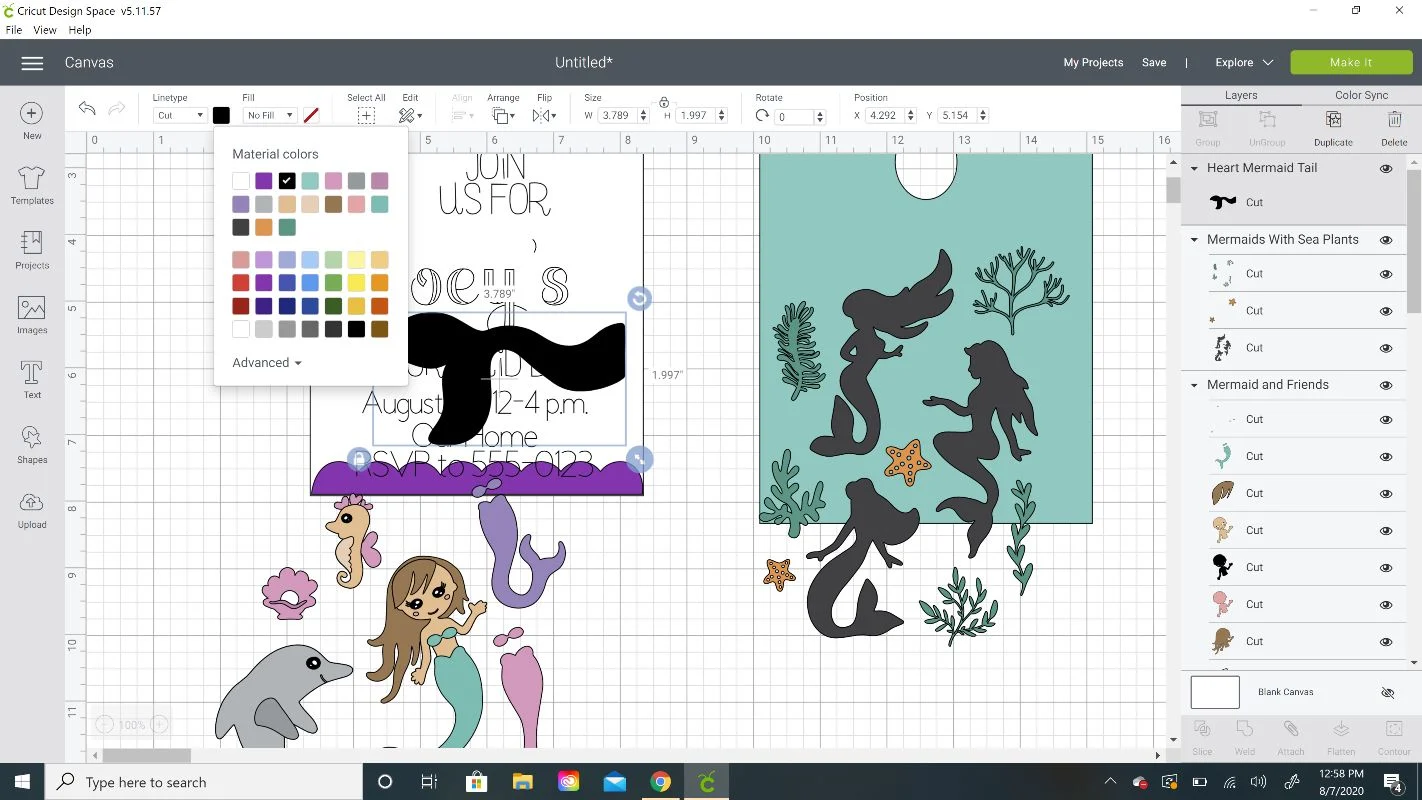
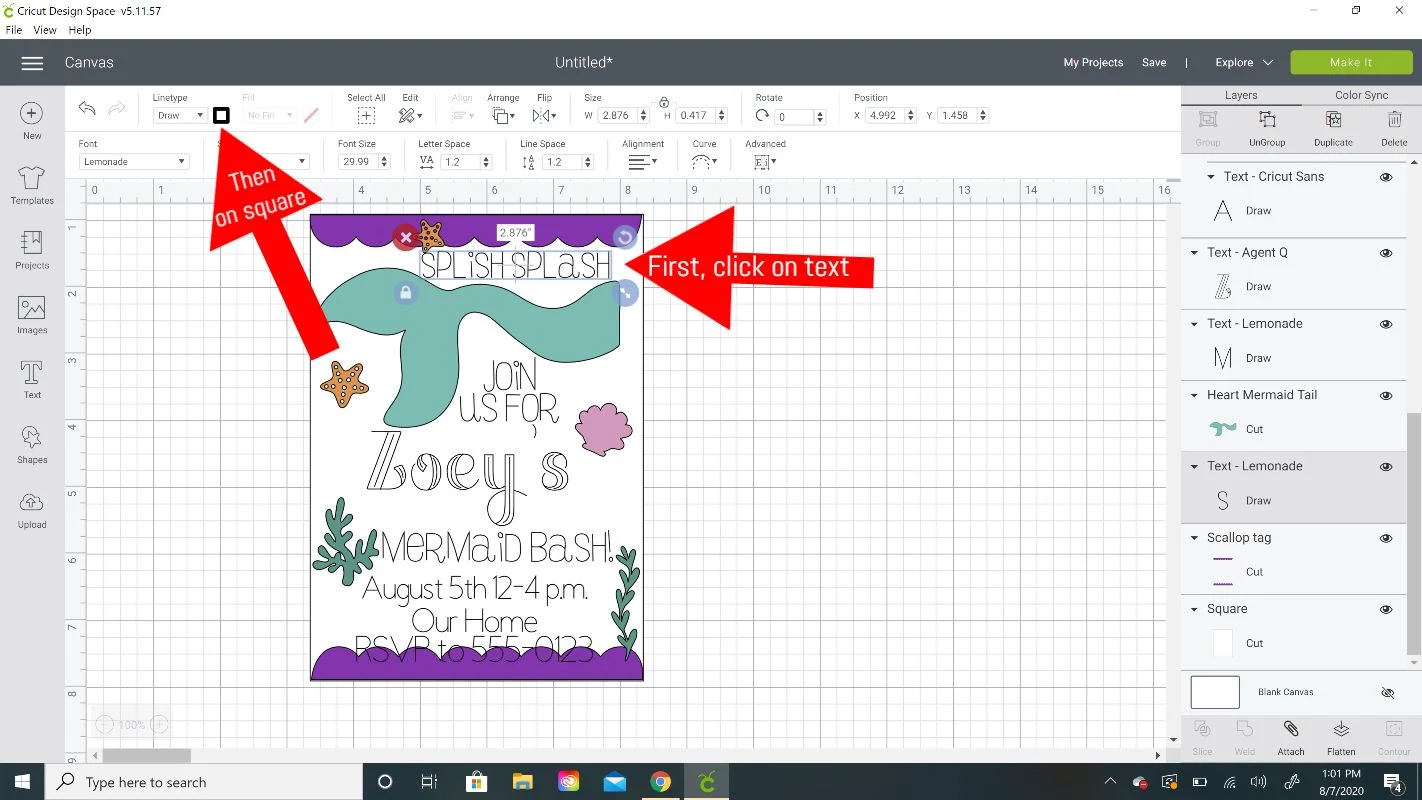
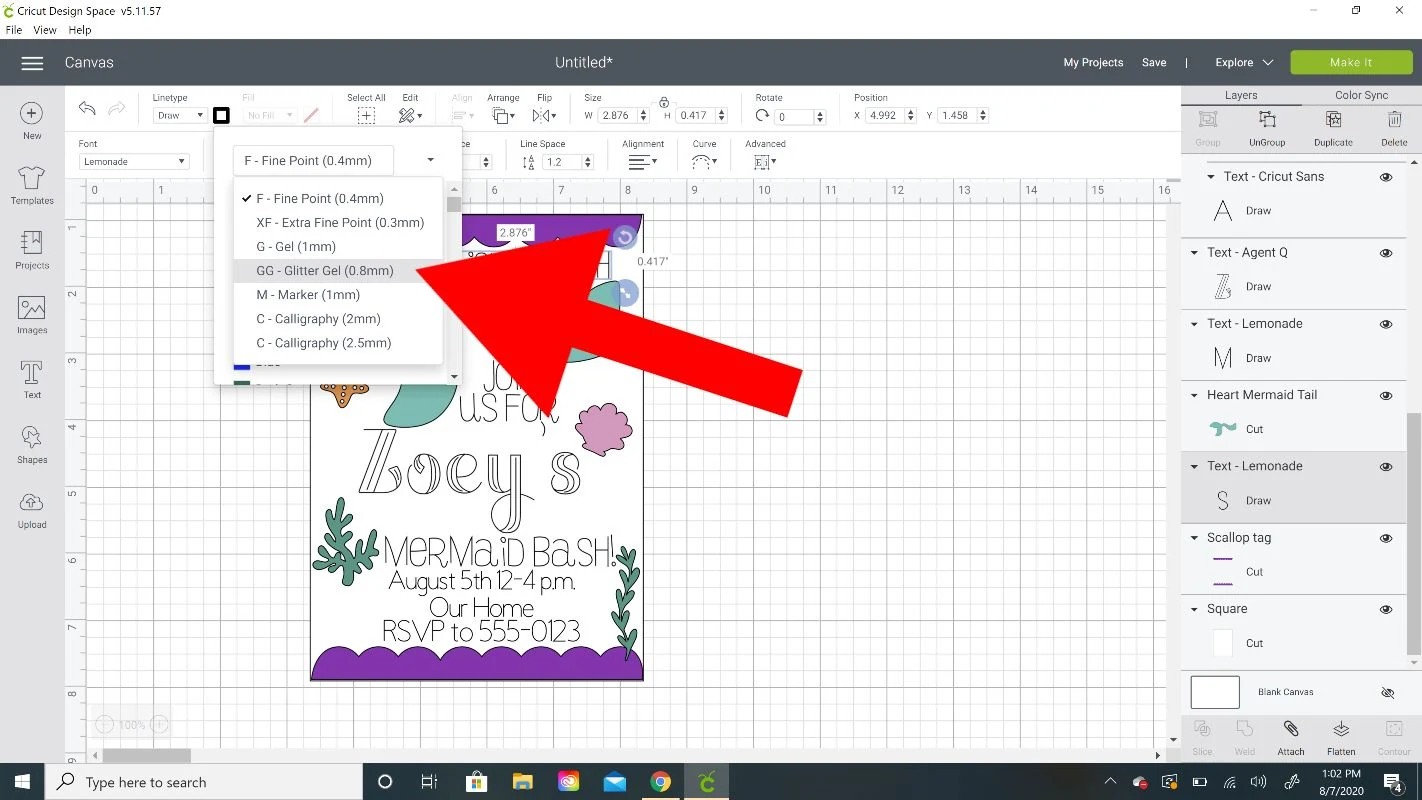
Then we need to change the pen type and color so that Cricut Design Space will prompt us to change to the exact pens we are using.
Click on some text and then click on the black square next to the word Draw at the top left.

Click on the drop down arrow and you will find all the Cricut pen options.
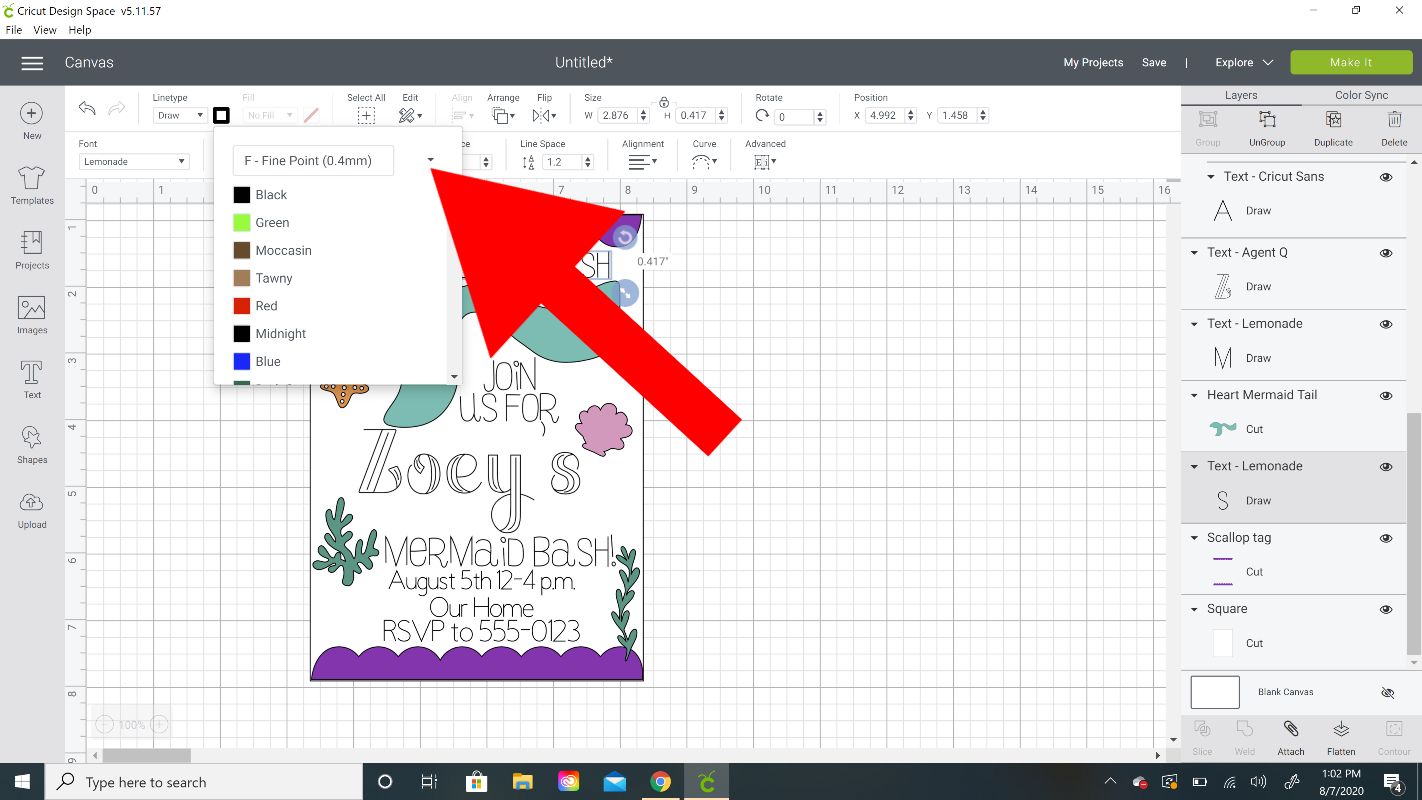

I chose Glitter Gel because that’s what I’m using.

Then you need to specify the color. This is very important so Cricut Design Space will stop and tell you to insert a different color! I chose Blue for this text.

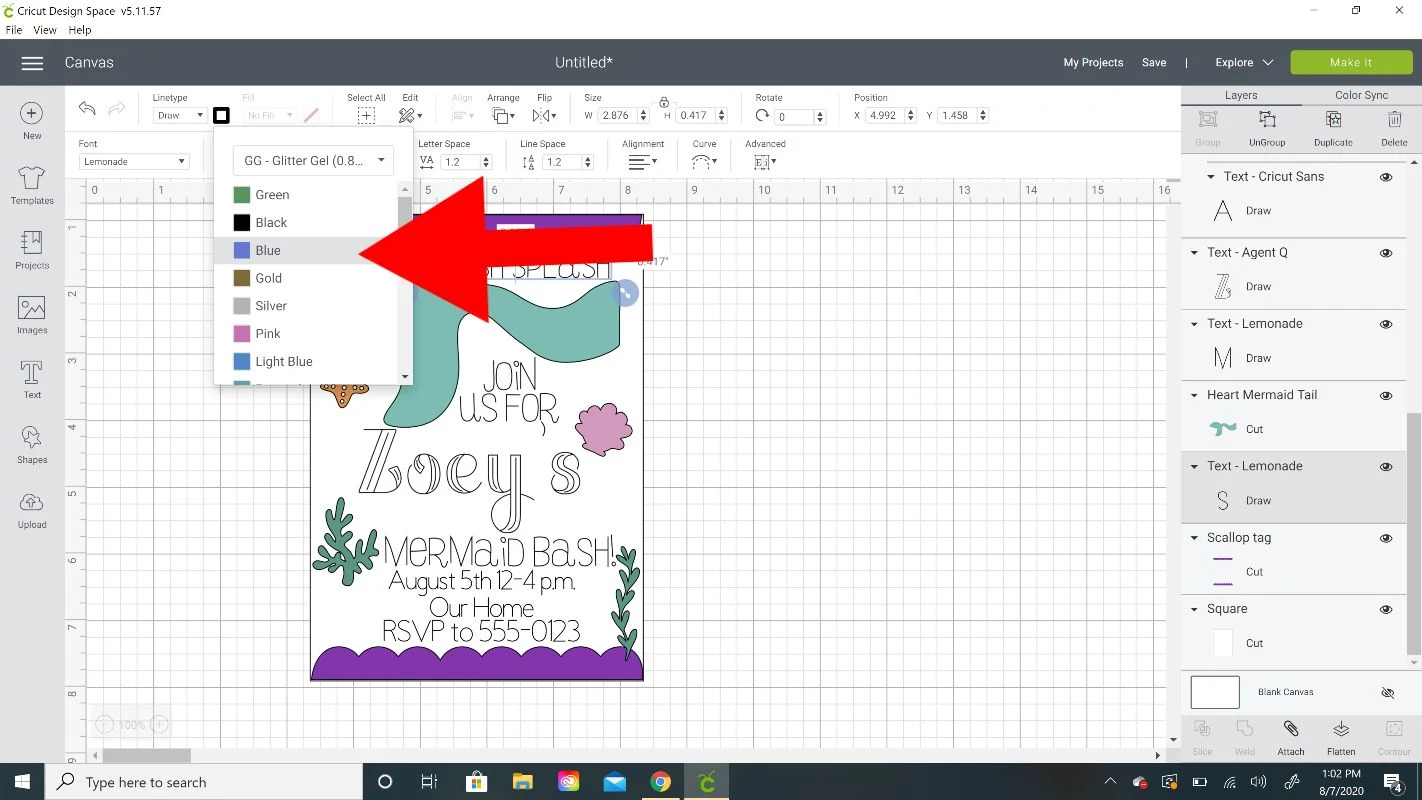
Keep repeating all the steps for each text box, choosing different colors for the text if you want.

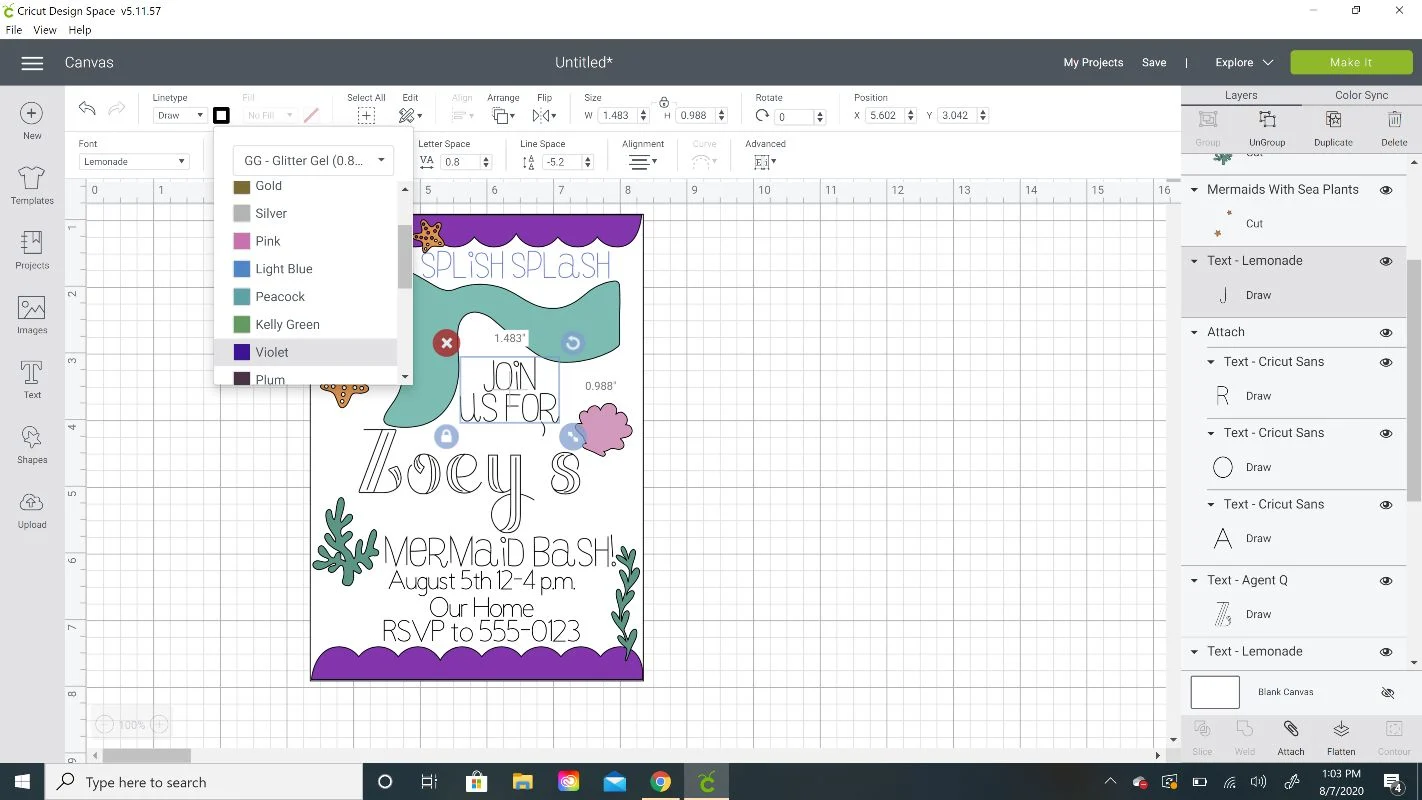
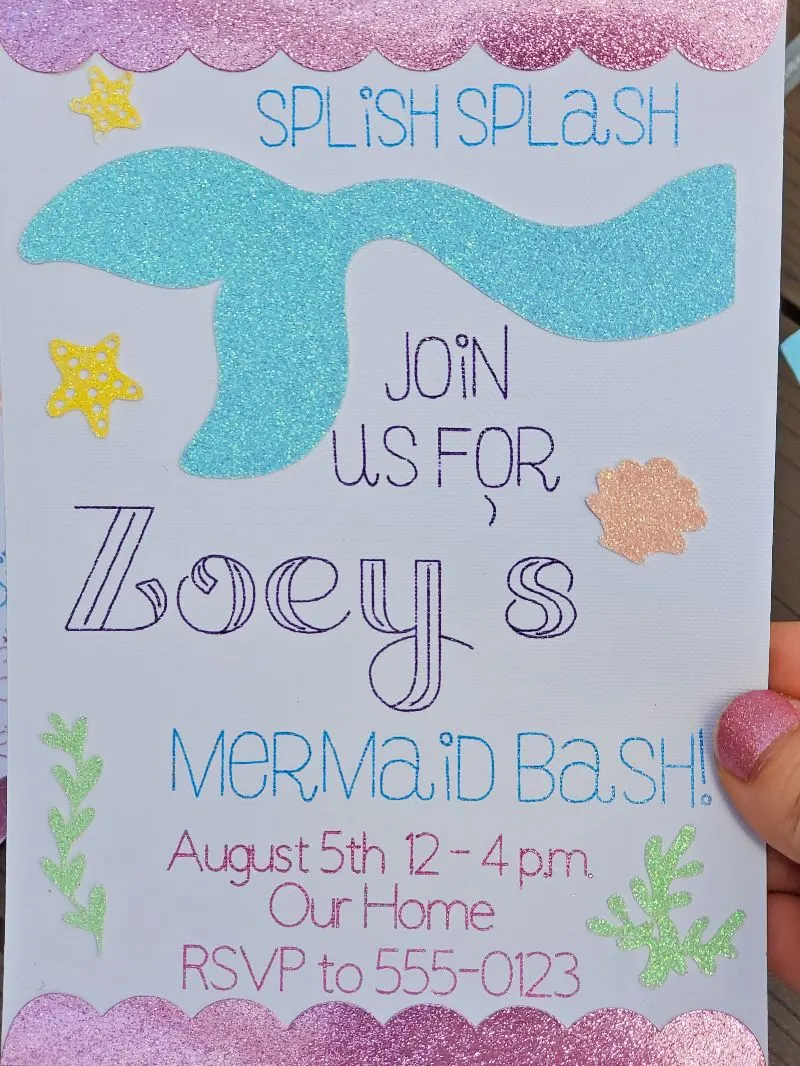
I used blue, violet, and pink on this invitation.

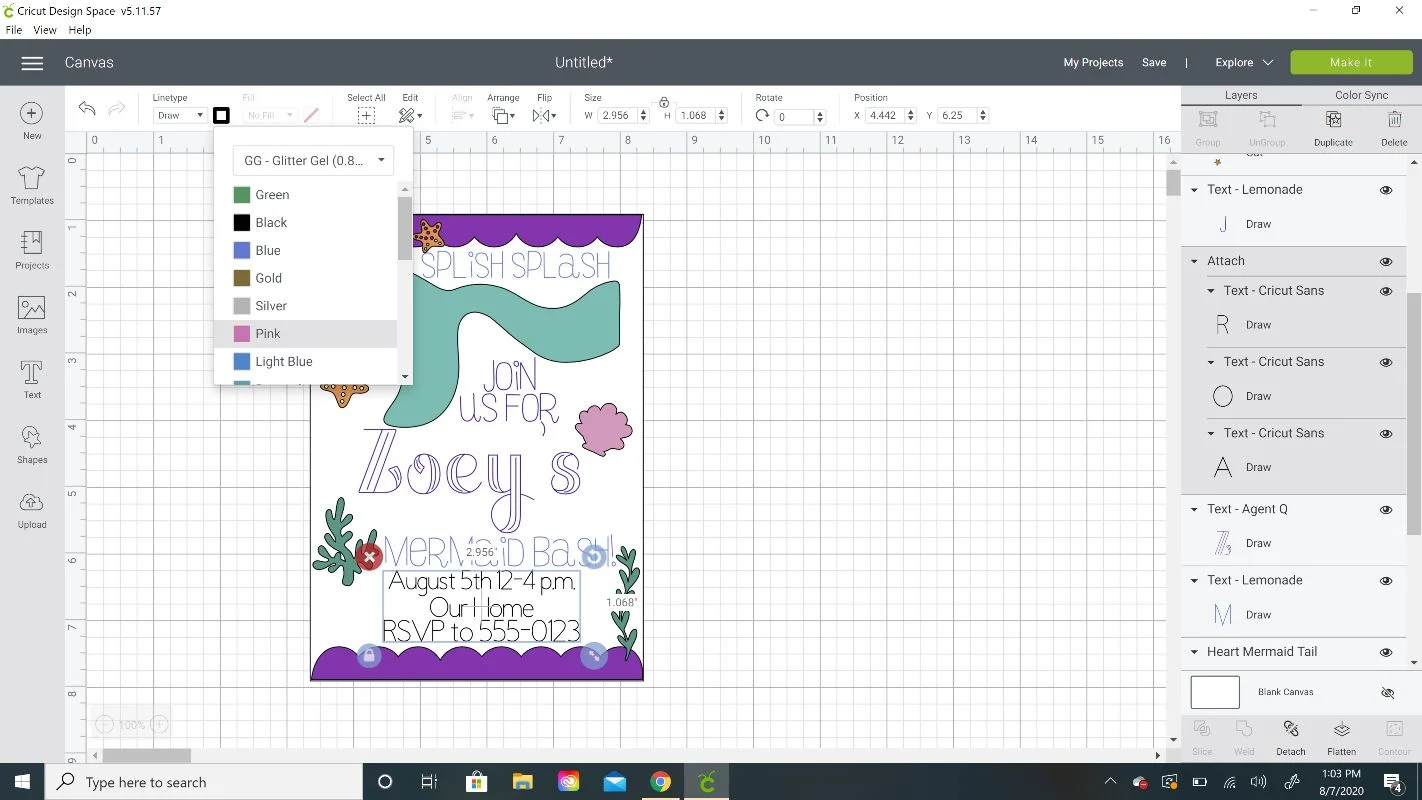
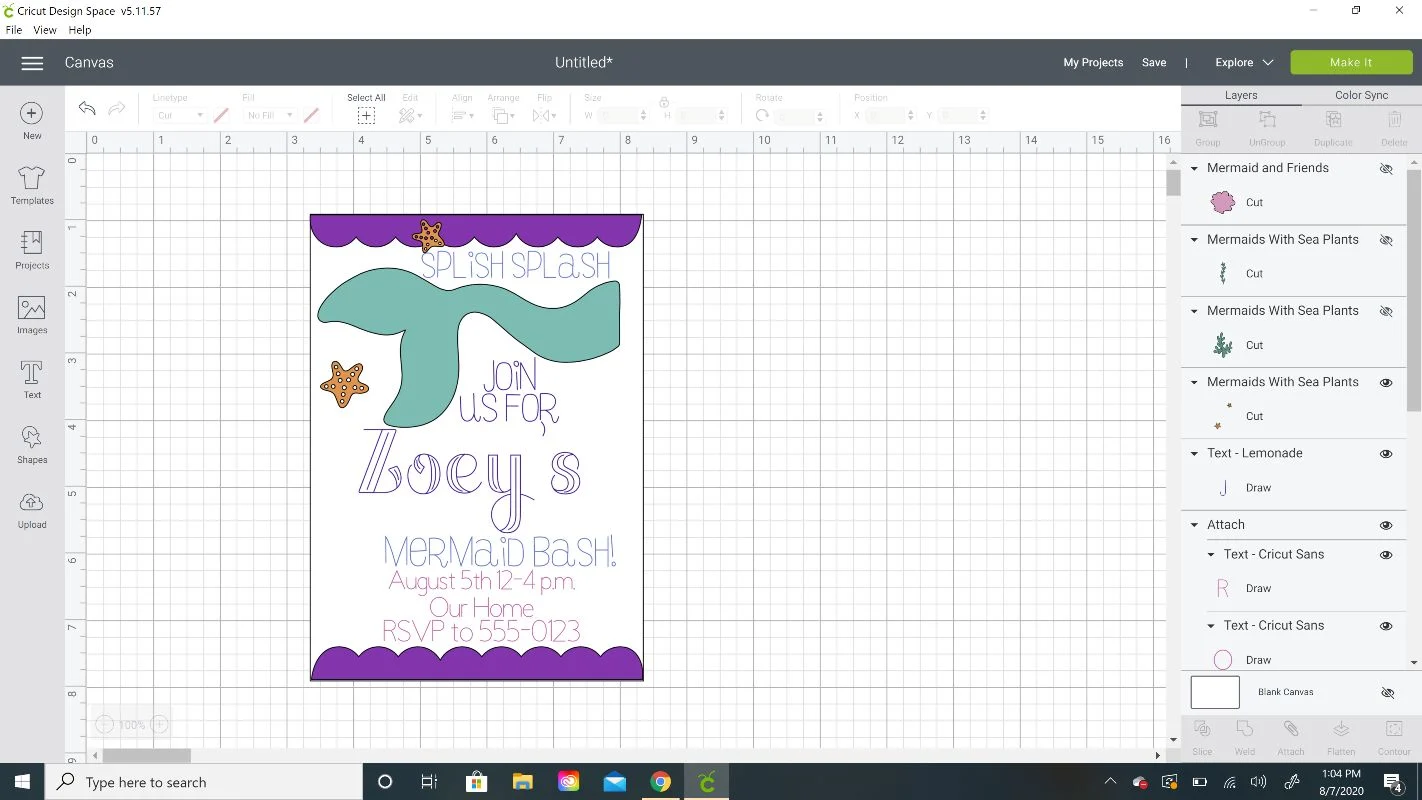
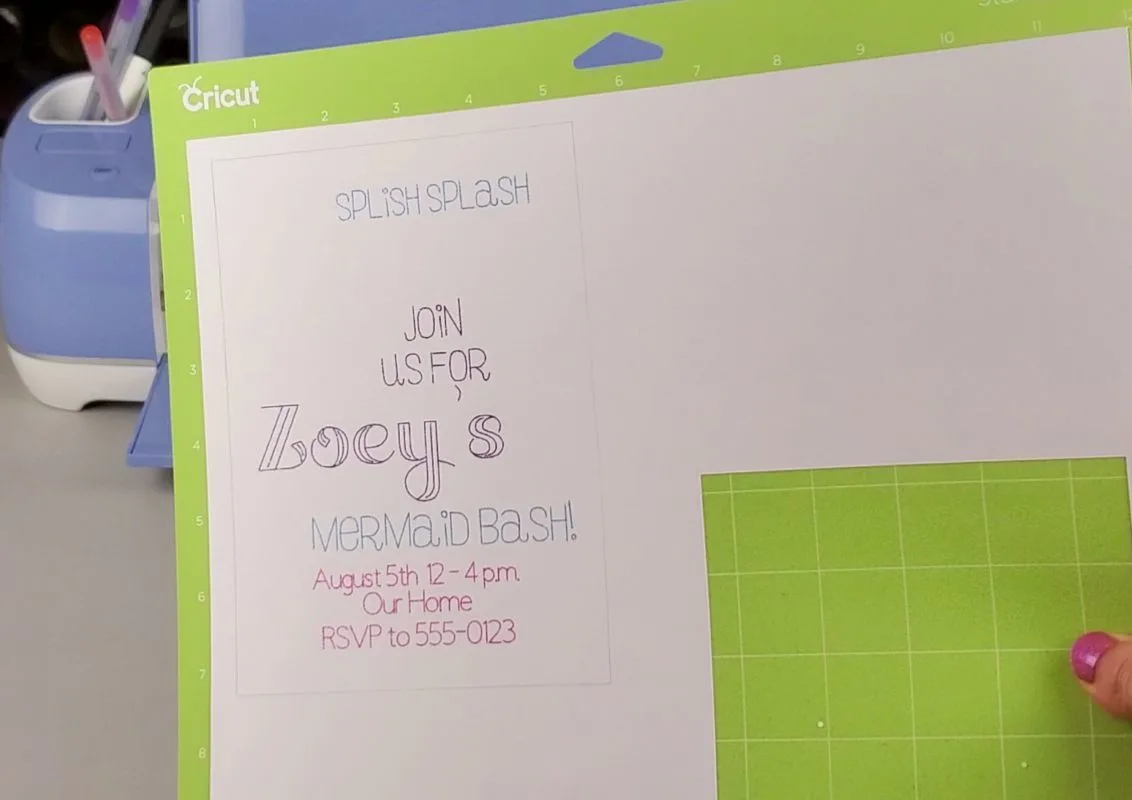
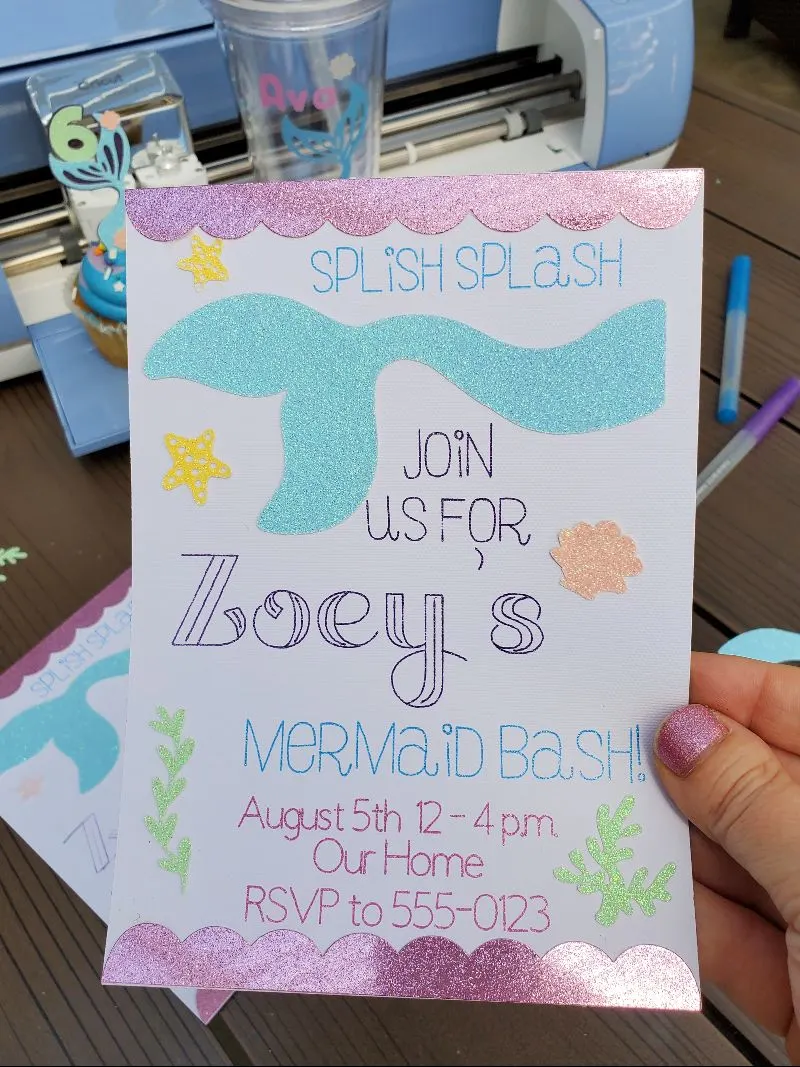
So here is what I want my final product to look like with all the different Cricut gel pen colors.

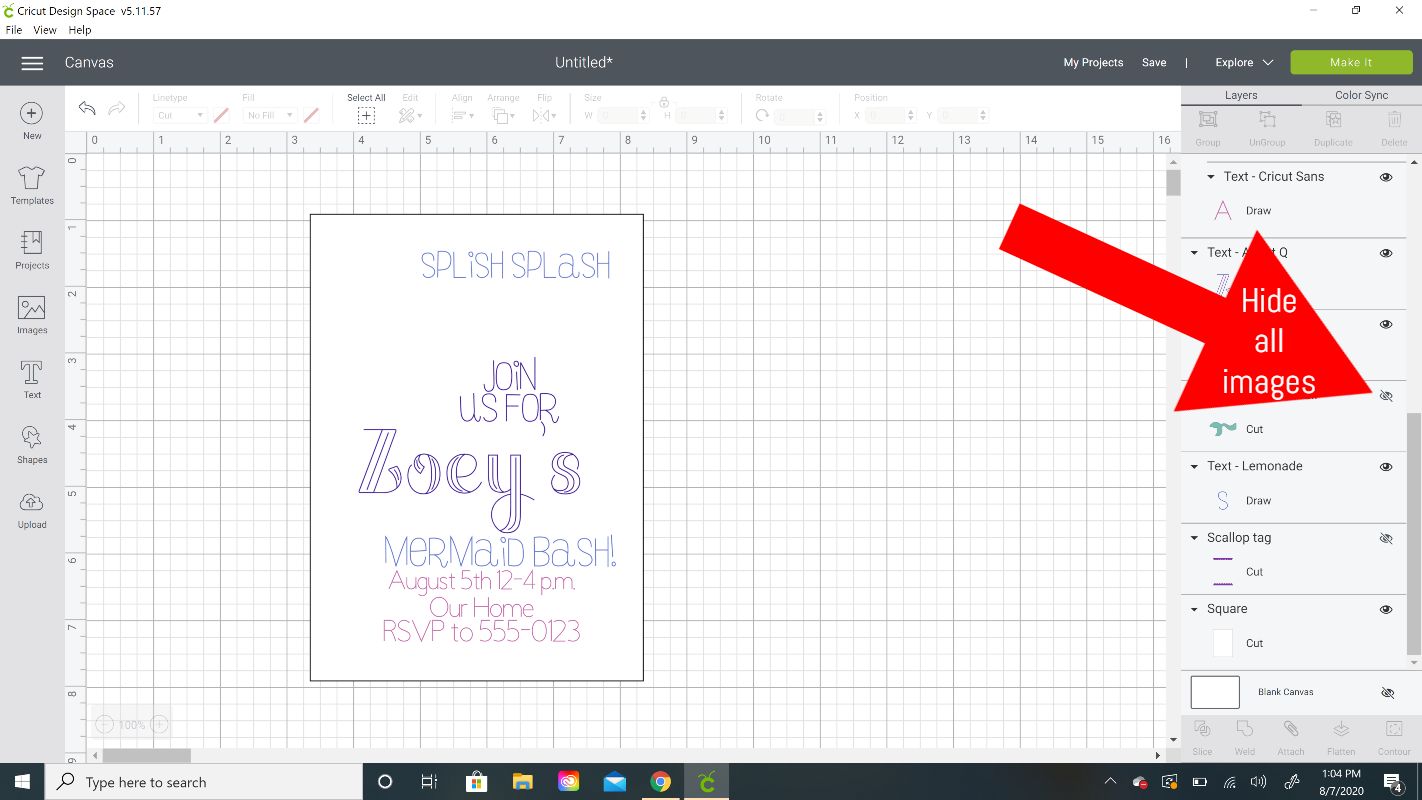
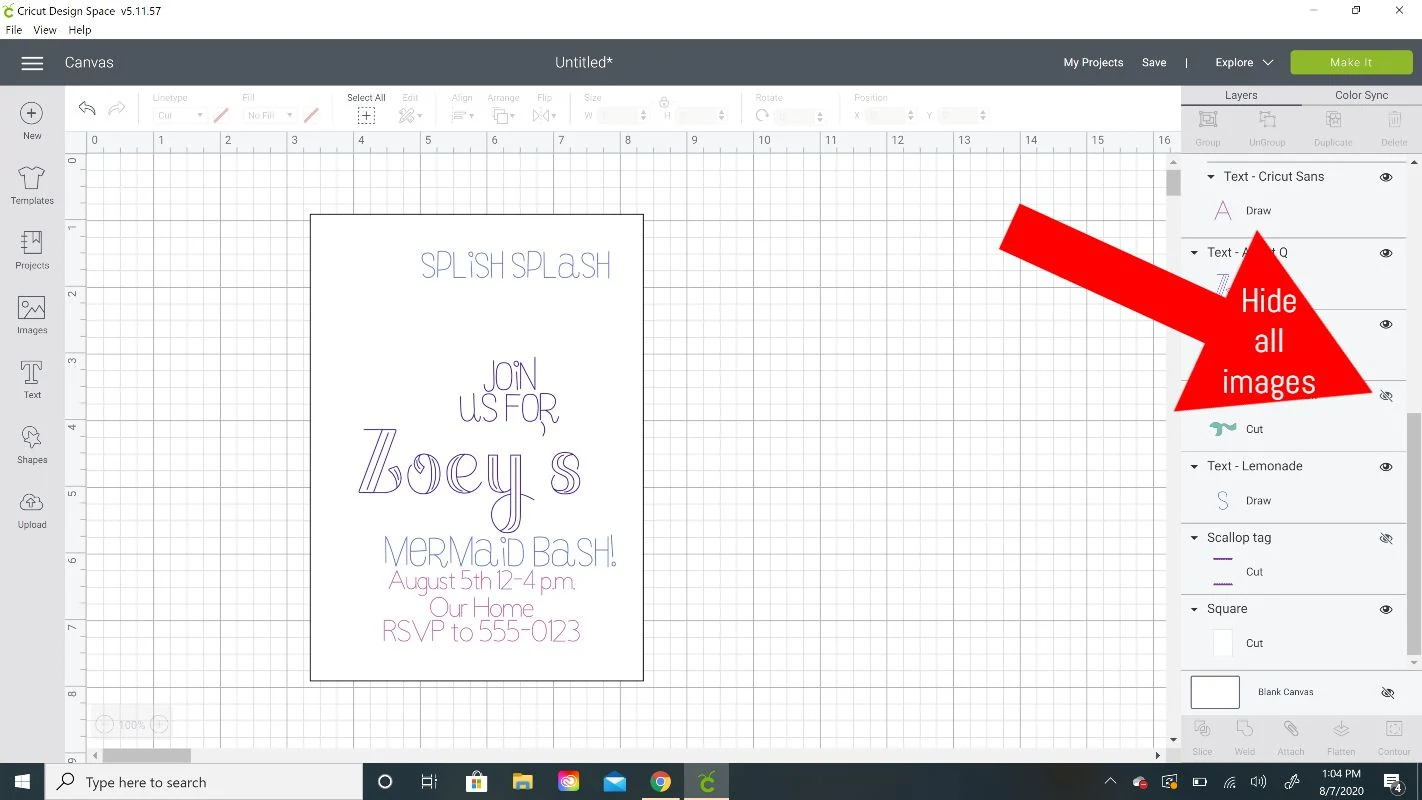
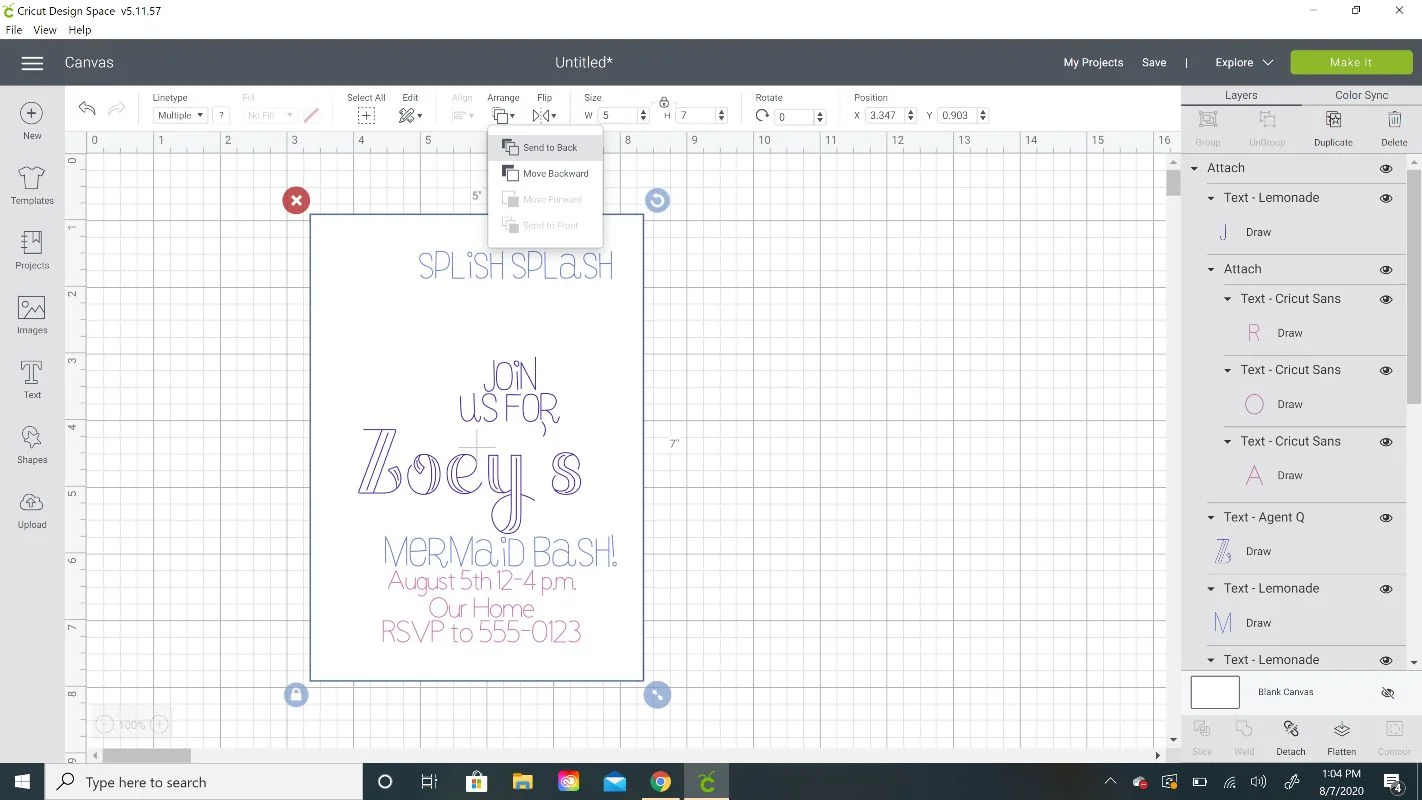
Now that all the font is the color we want it and the size we need to attach it to the rectangle. I find it easiest to hide all the cut images (click on the eye next to each cut image on the Layers panel)
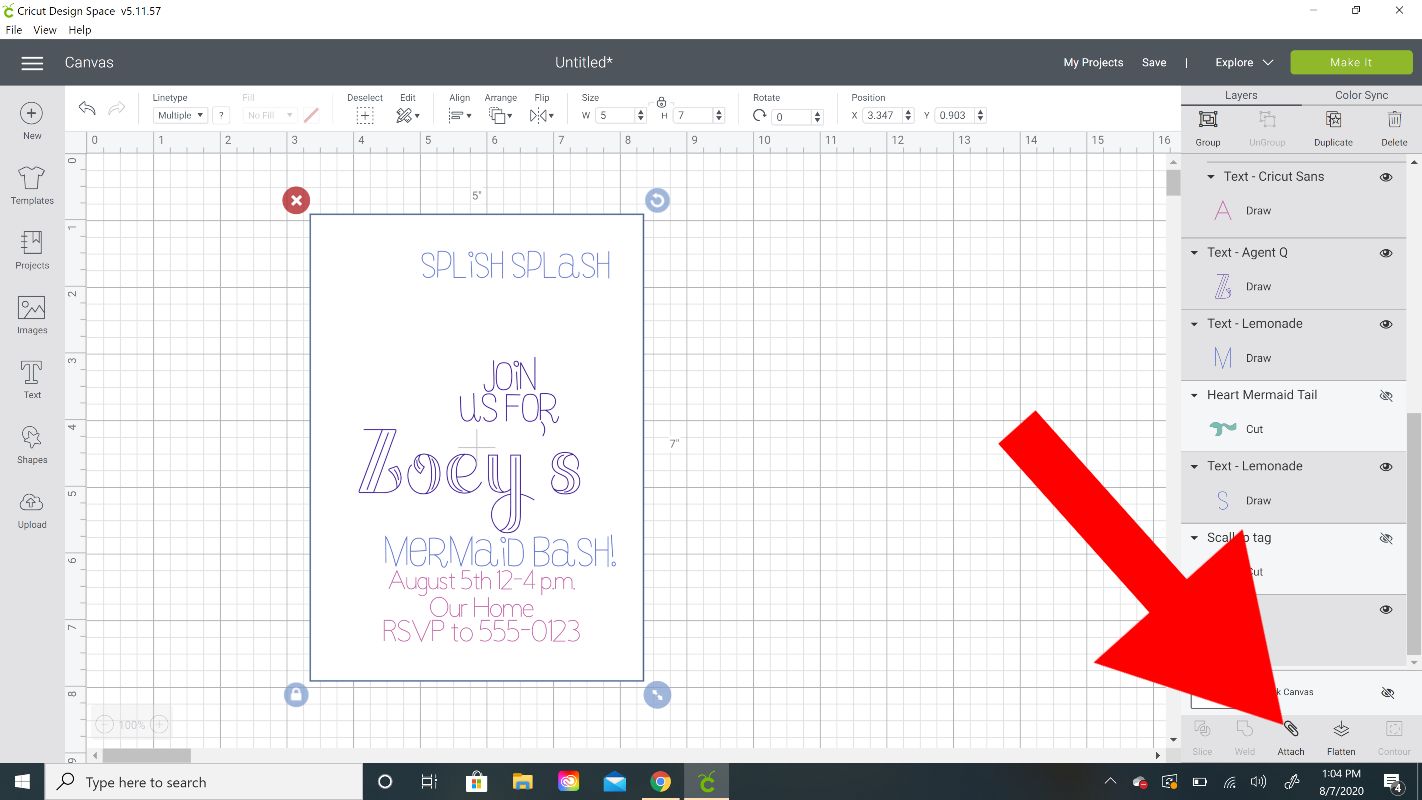
Now either use the Select All function or your cursor to put a box around the entire rectangle and text. With all of it selected, click on Attach on the bottom right.

When things attach, CDS automatically moves it to the front. Since I wanted to see all the images on the card again, I moved the rectangle to the back by clicking on Arrange drop-down and selecting Send to Back.

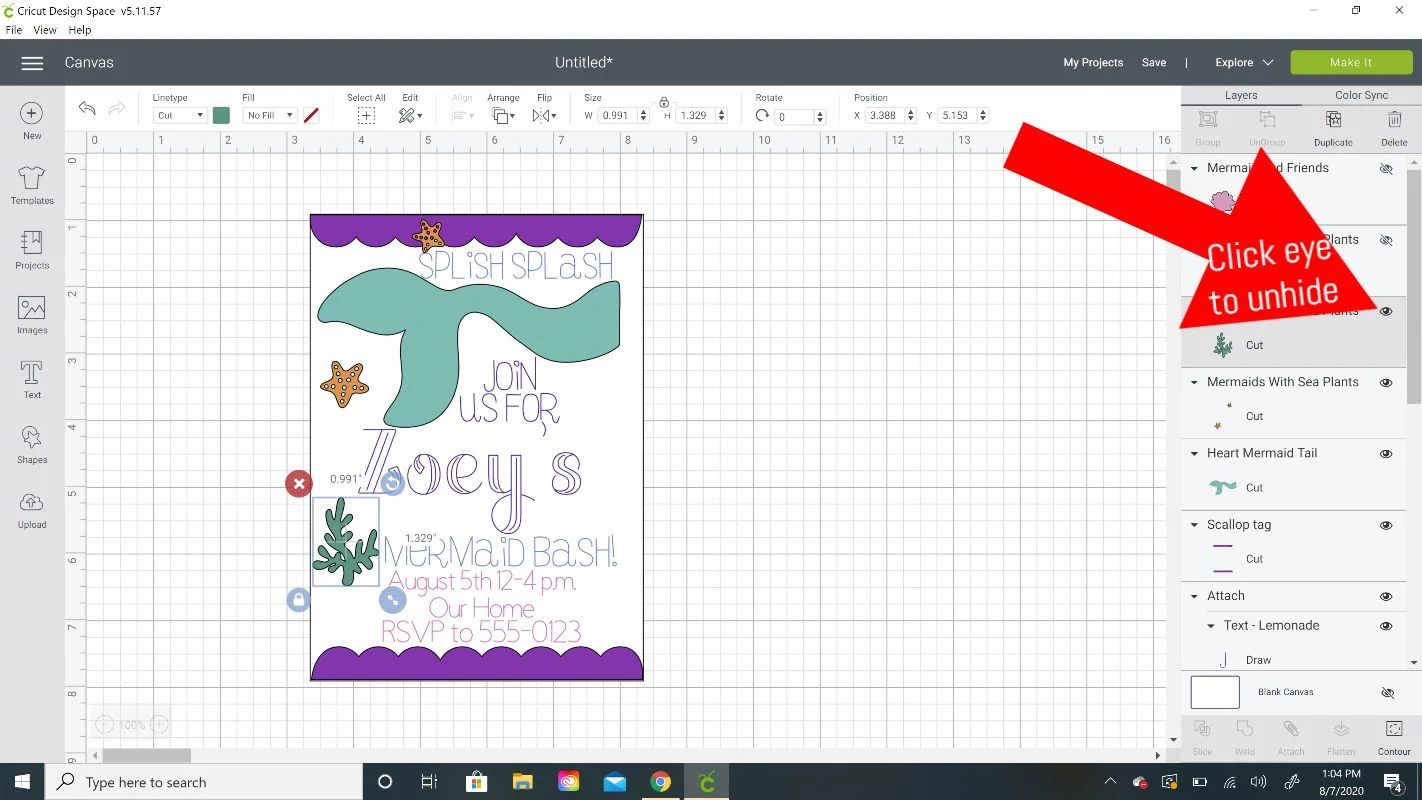
Then I clicked on all the eyes of the cut images so they would appear again. Now I’m ready to draw and cut!

Make sure to save your project and then click on Make It.
On the next screen you’ll have the option to increase the project copies if you are making more than one.
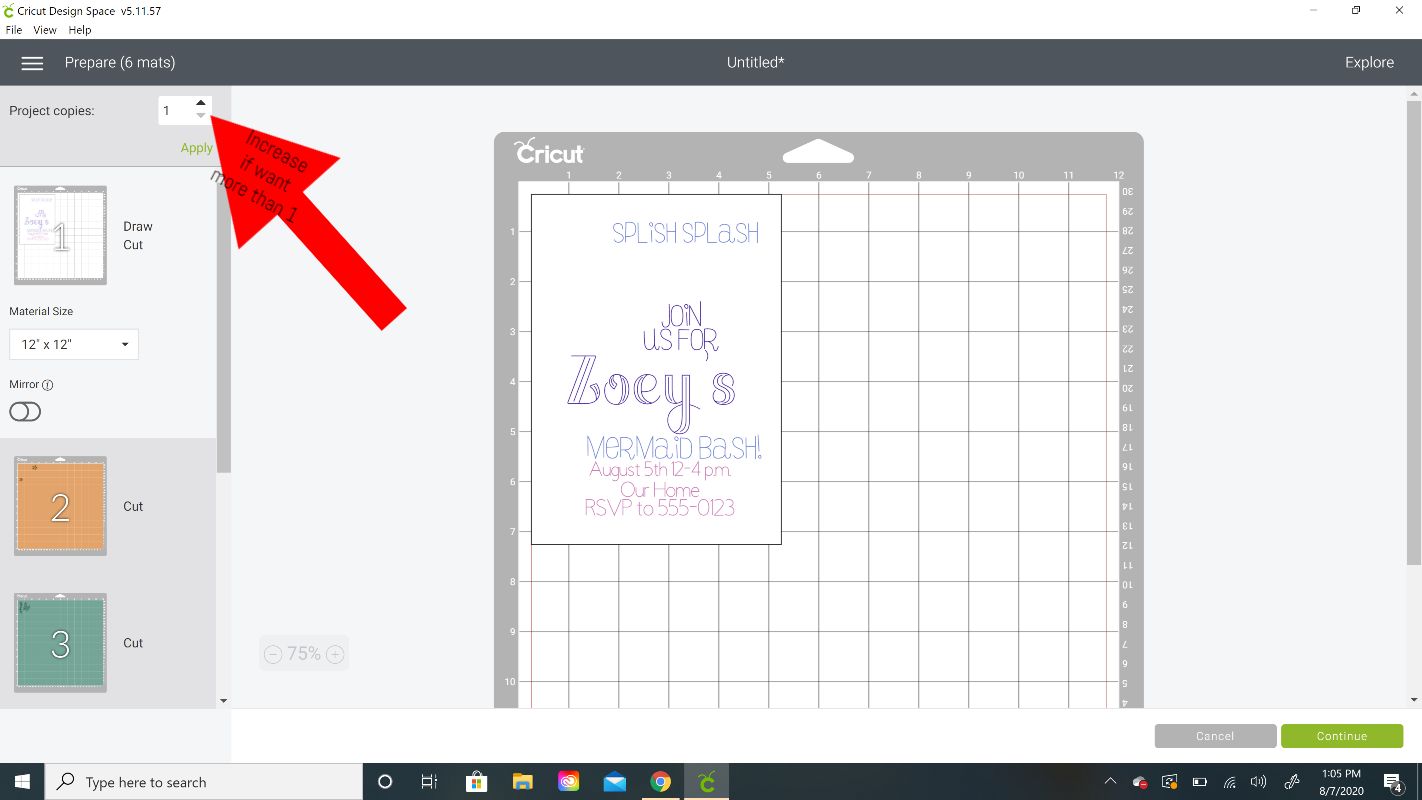
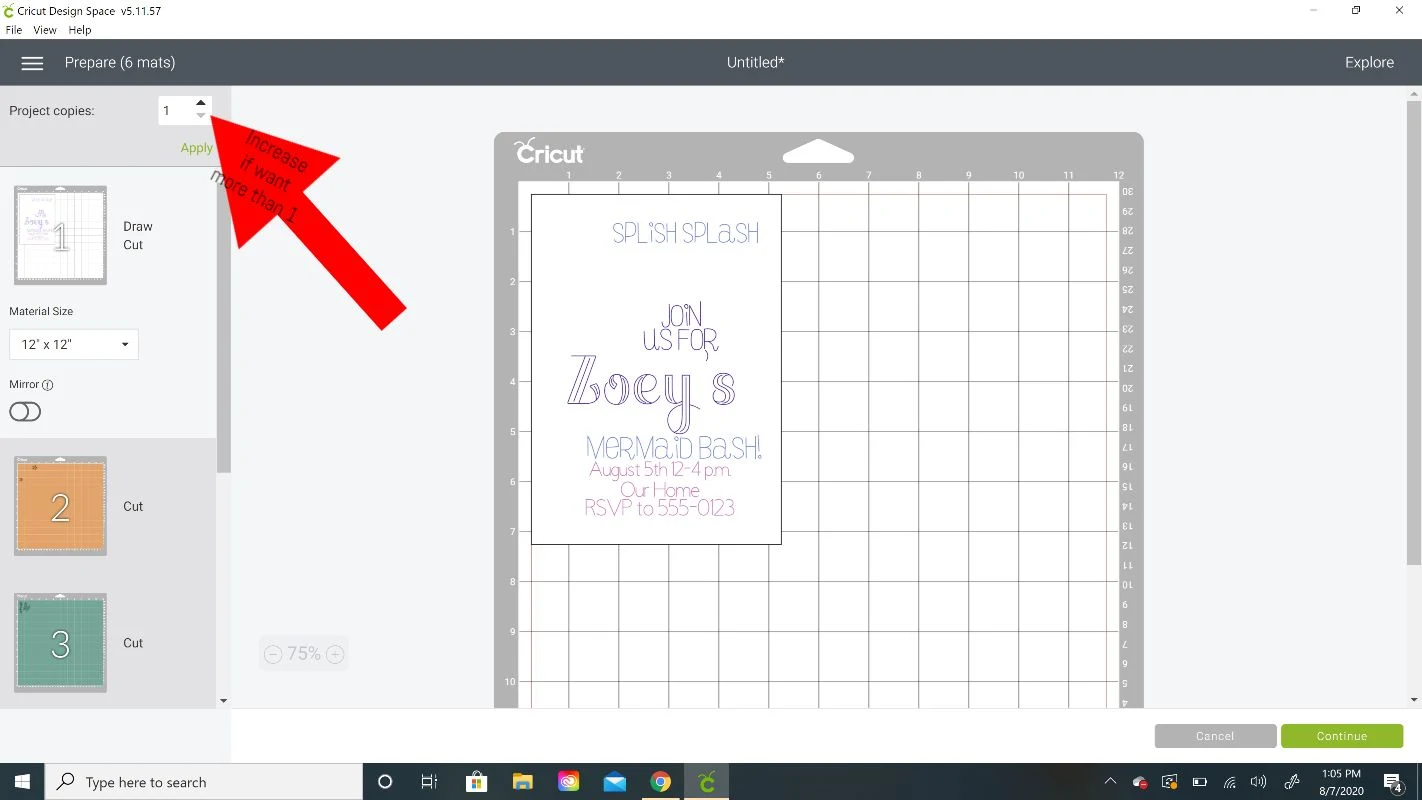
Click Continue and connect your machine.
Drawing and Cutting the Invitation Pieces
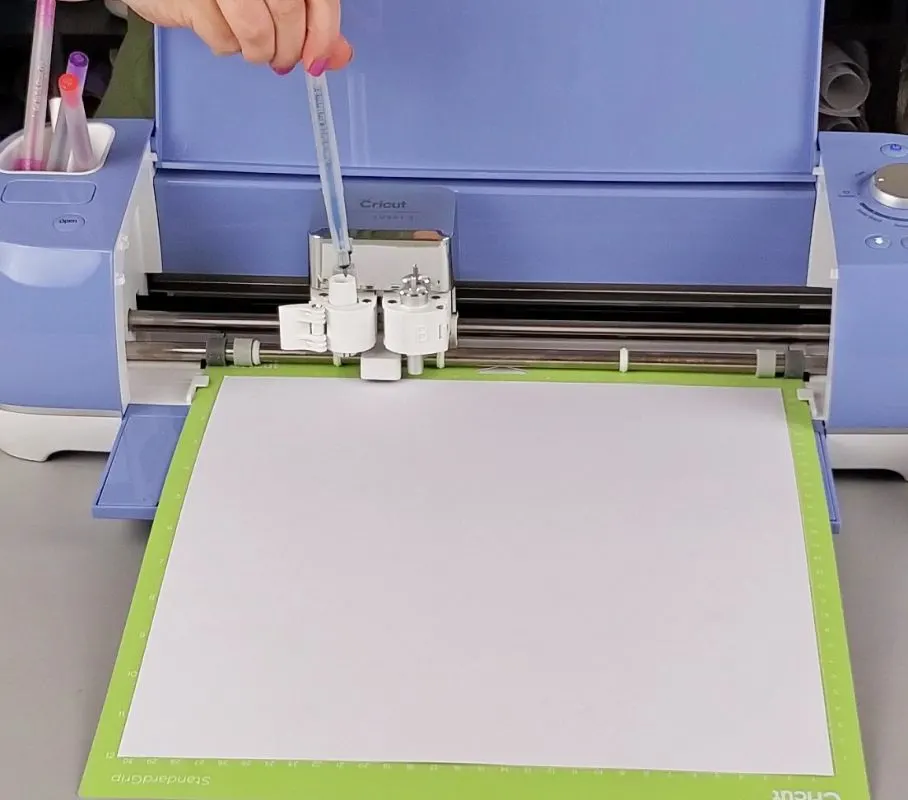
*Pro Tip: When using the glitter gel pens, scribble on a scrap piece of paper first to get the pen flowing. I forgot to do that for one pen and it didn’t draw a few letters!
Follow all of the prompts from Cricut Design Space on when to insert which color pen.
I placed the white cardstock on a strong grip mat and loaded the first color I was told to first in Clamp A. Open up the clamp and push in until it clicks then close the clamp.


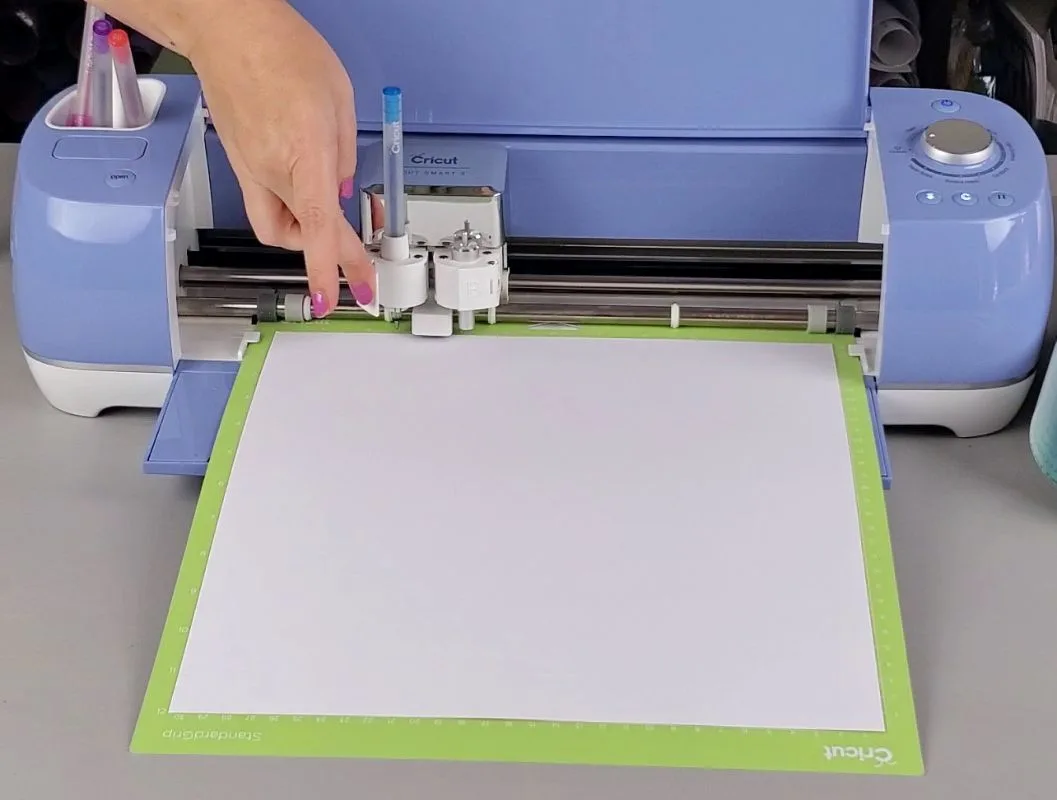
The Cricut will pause and your CDS screen will tell you which pen to load next. Then click the flashing C light for it begin again.

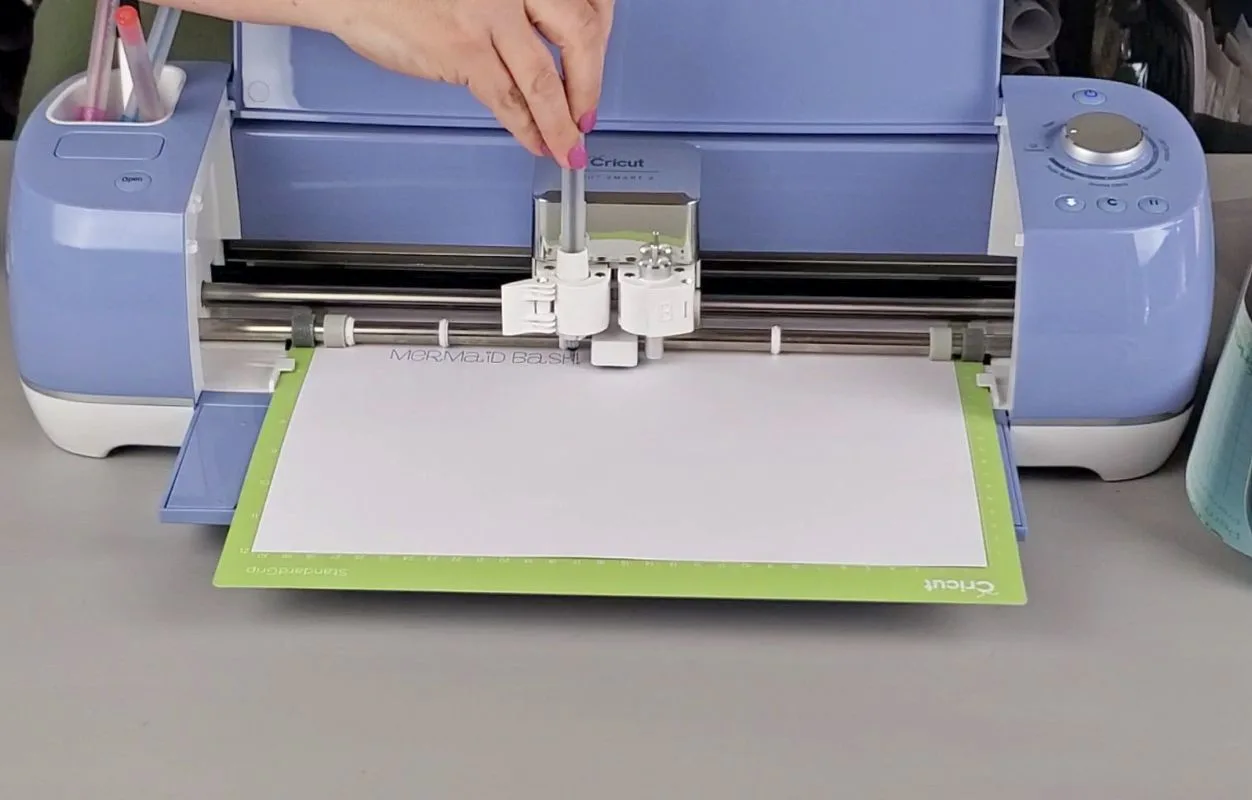
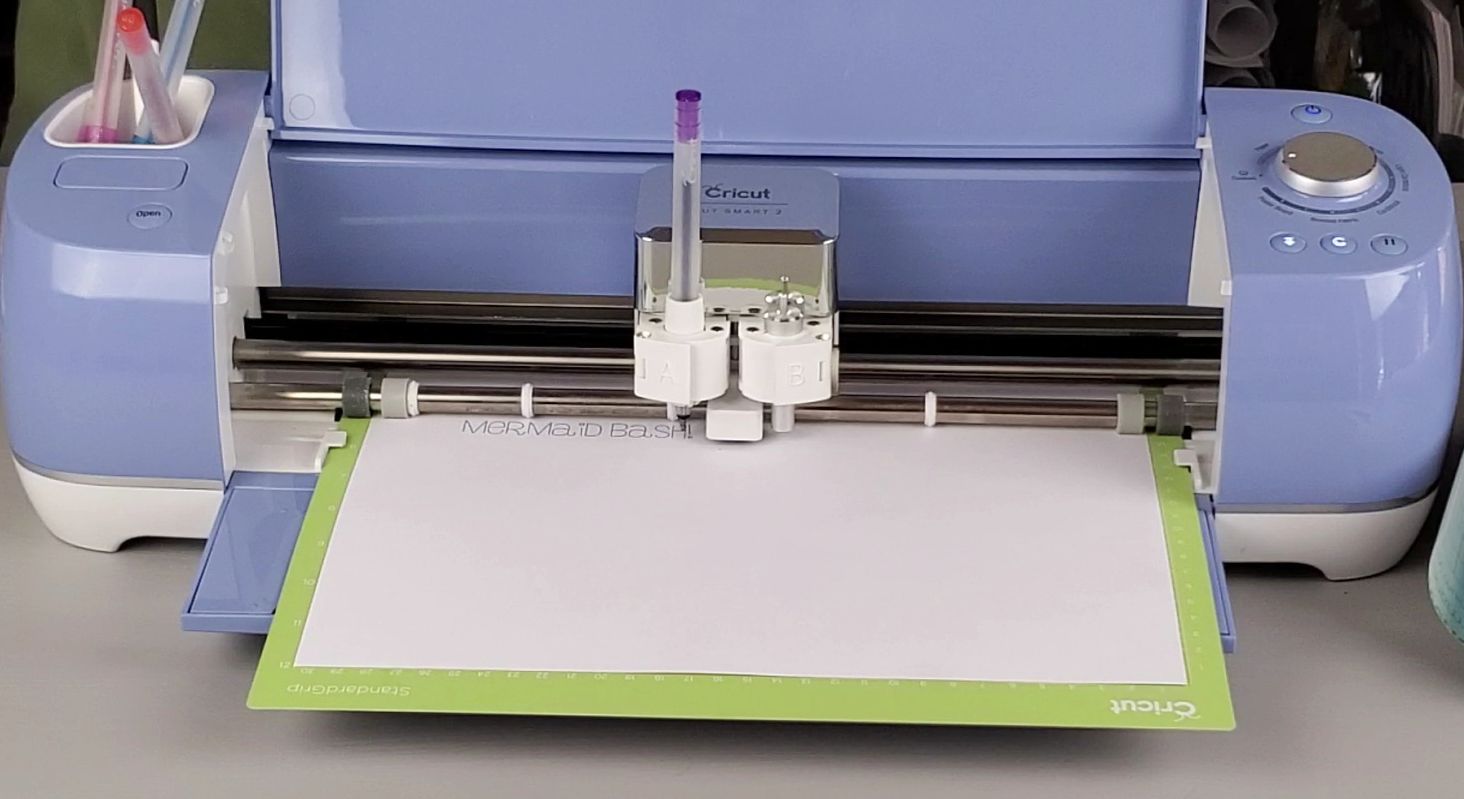
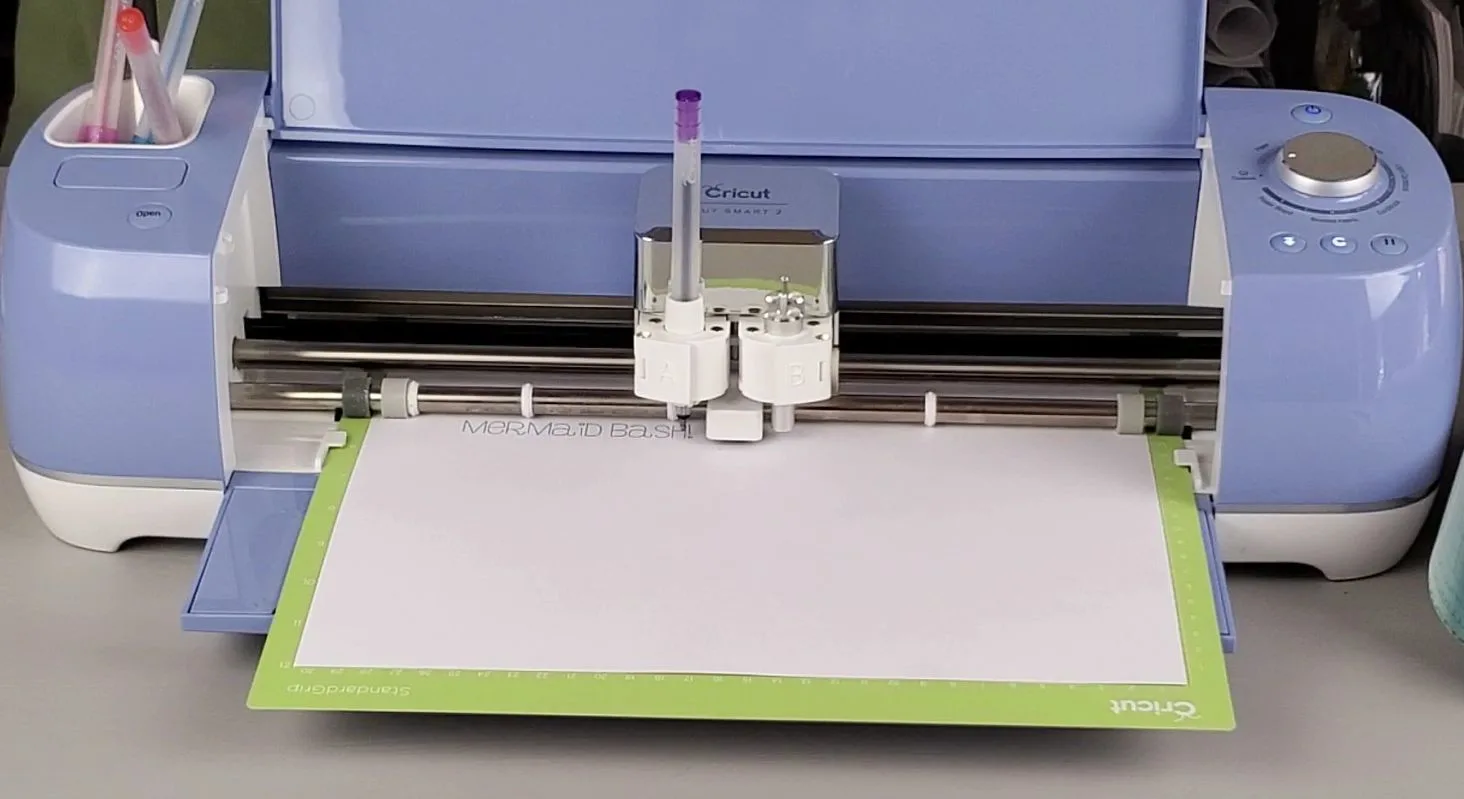
Once it’s down writing, it will cut out the rectangle and then flash done. Unload the mat!

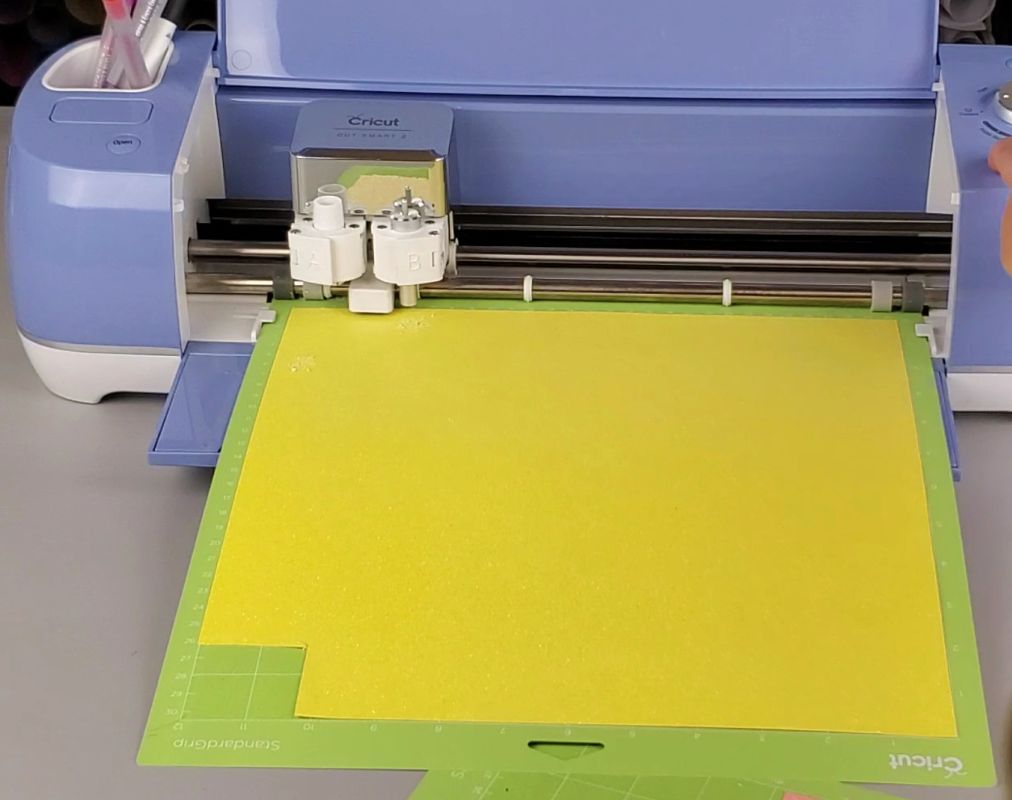
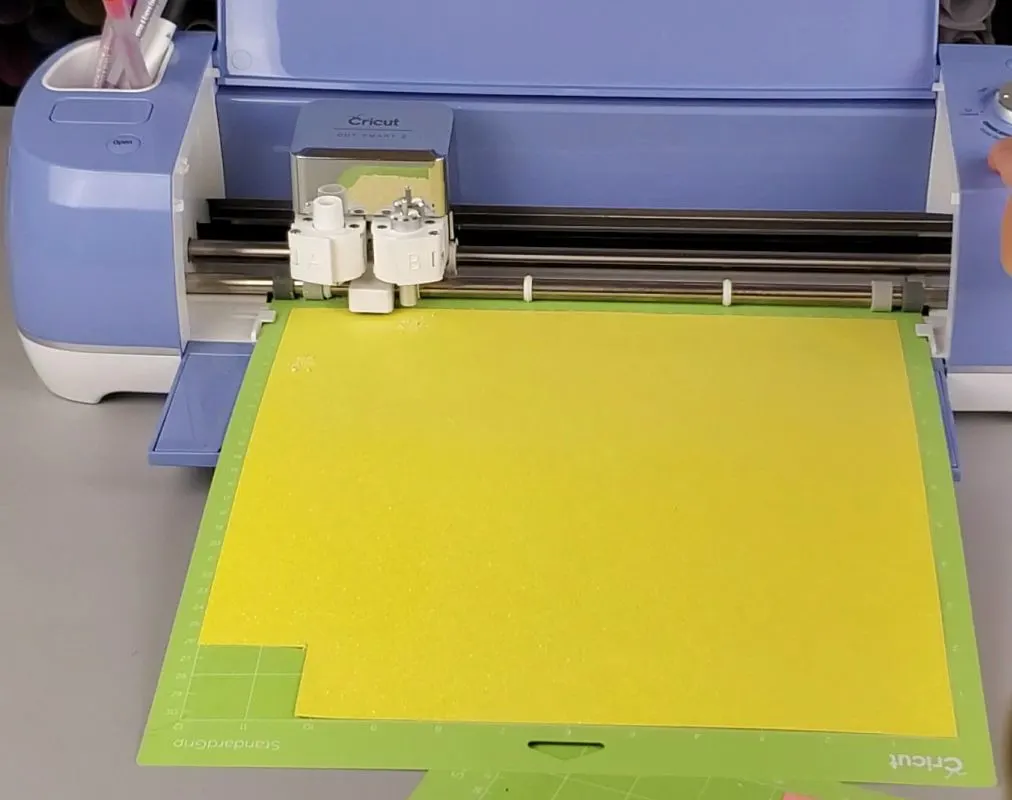
Continue following the prompts from CDS to cut out all the rest of the images. Make sure to watch my YouTube video below for the rest of the process if you need more help with all the different mats. It starts at the 7-minute mark.
Once everything is cut out, remove the pieces from your mats and put the invitation together. You can use a glue stick or double sided tape or your preferred gluing method!
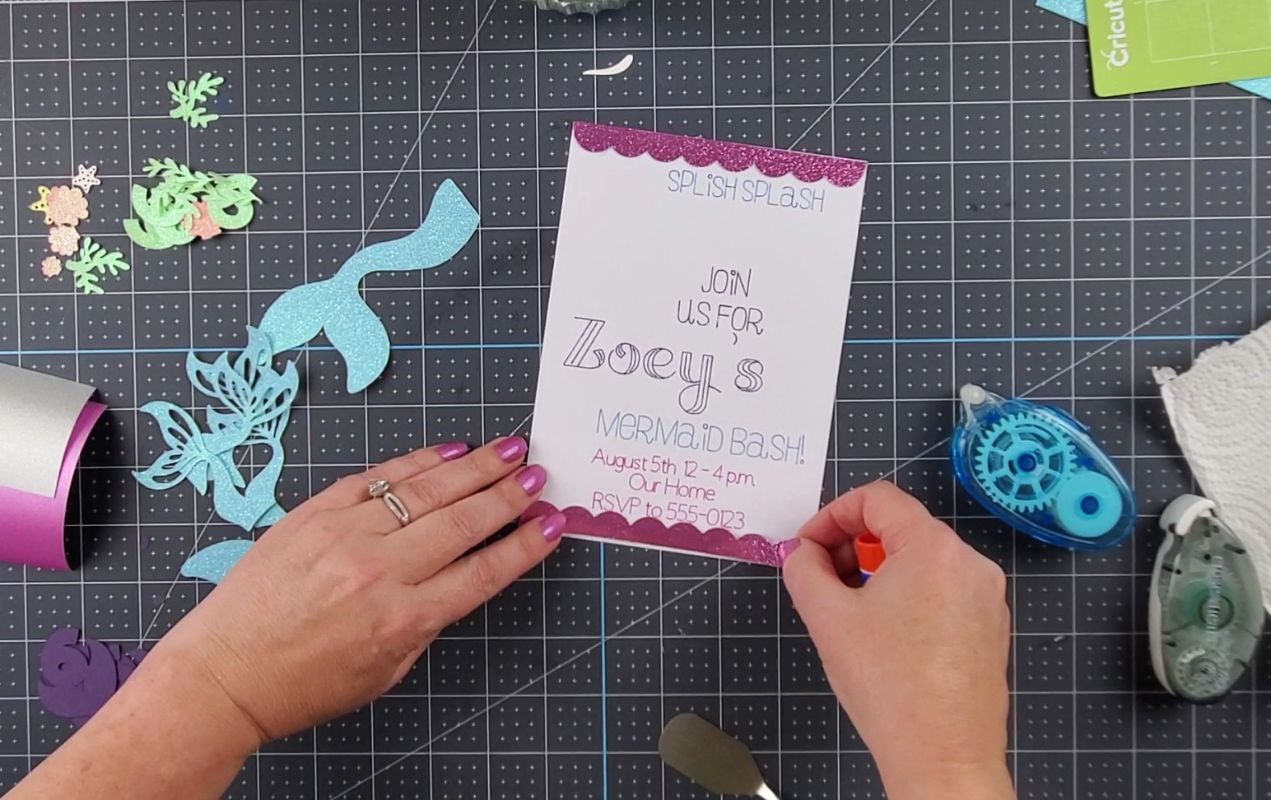

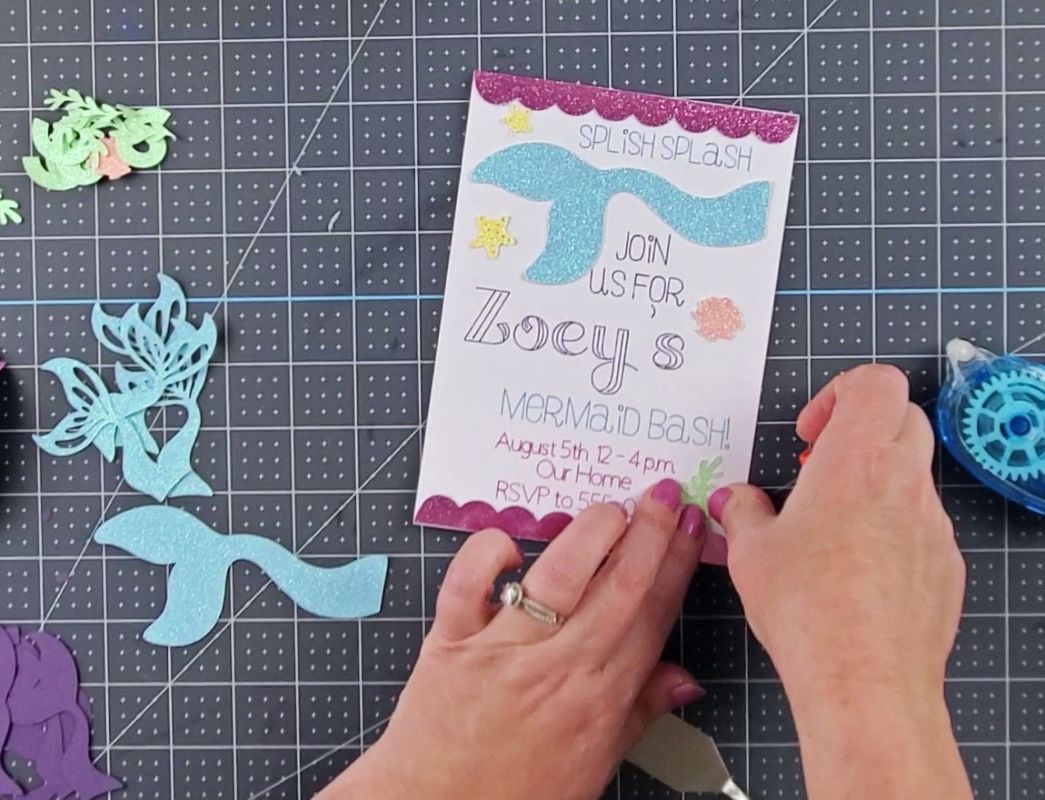

There you have it! Cute and sparkly Cricut invitations for a festive mermaid party!


There are so many possibilities when using the Cricut to design invitations. Imagine an 80s themed birthday party invite! (grab our 80s trivia printables to use at the party too!)
Mermaid Party Cricut YouTube Video
To watch the full detailed tutorial on making all of the mermaid party crafts, go to my YouTube channel here.
If you’d like to save this post for later, simply hover over the image below and PIN It now!

Thanks for stopping by and have a creative day!