
Learn how to make his and hers mugs the easy way!
Hi Friends! I have ventured into the wonderful world of water slide decals. Have your tried them before?
They are so easy and fun to use and can be put on so many things.
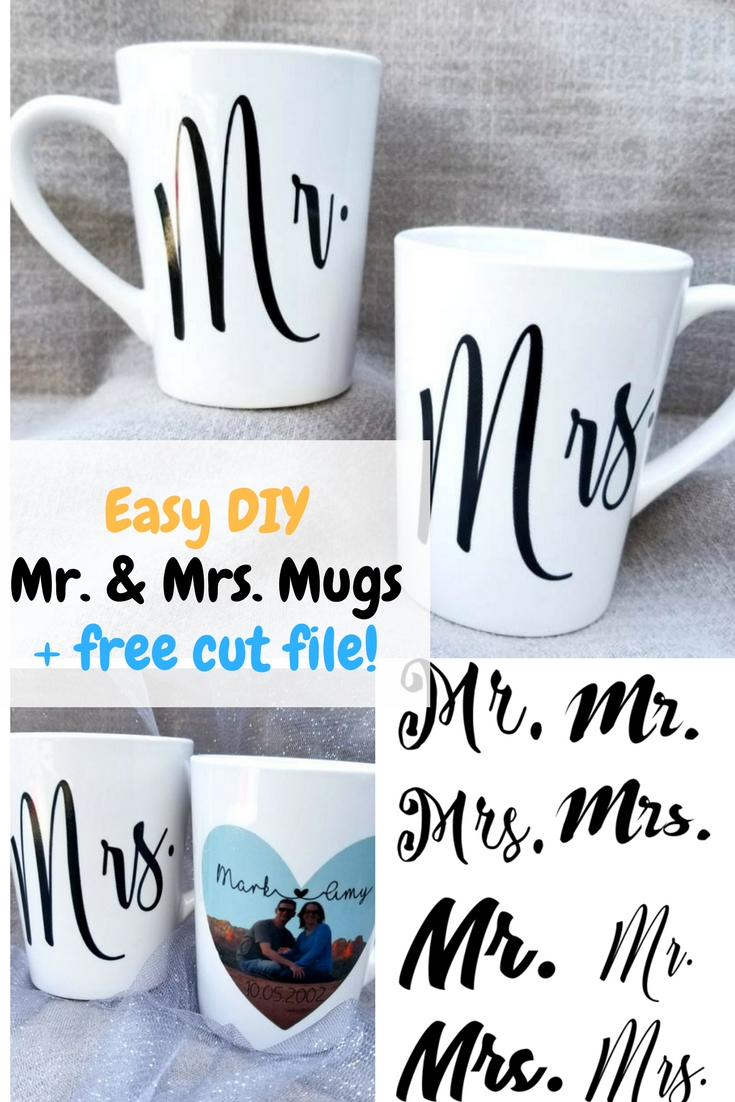
Today I am going to show you how to make his and hers mugs that would be perfect wedding gifts, Valentine’s gifts, anniversary gifts, engagement gifts, or you can switch it up and make one for friends, parents, or even for party favors.

Also, don’t worry if you don’t have a Cricut or other cutting machine because I’m also going to show you how to make the same mugs without one!
Win, win, right? Also, did I mention you get a free cut file too?? So, let’s get started!

Materials Needed for His and Hers Mugs
Disclosure: This post contains affiliate links from Amazon and/or Cricut.com. I receive a small commission at no cost to you when you make a purchase using my links (purple text).
-
- Mugs – I got these ones from the Dollar Tree
- Water slide decal paper – I got mine from Amazon here since I have an inkjet printer
- Rustoleum Gloss Protective Enamel
- Cricut Explore (optional) If you have one, you probably love it as much as I do! You can check out my Ultimate Resource Guide of Cricut Ideas by clicking here!
- Vinyl, Transfer Tape, and Sharpie Oil Based Markers (optional)
- FREE PNG download – Click Here!

I will first show you how to make the Mr. and Mrs. side of the cup, and in two different ways!
Can you tell a big difference between the two? The Mr. one was done with a Sharpie and the Mrs. was done using water slide decals. Let me show you what I did…
First Method: Uses a Cricut or Cutting Machine.
Download the file and upload it to Cricut Design Space. Choose whichever Mr. and Mrs. you want and size it.
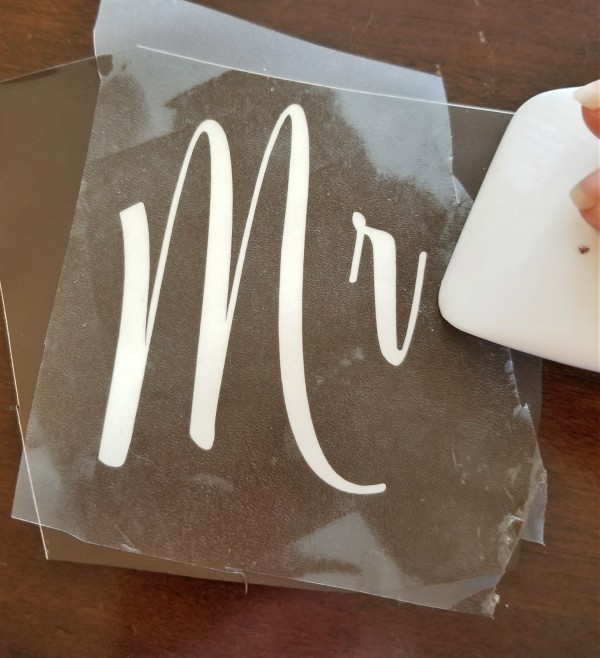
I made mine about 3 inches tall but measure your mug and estimate what you want. After you cut it, you are going to weed out the letters since you will be using it as a stencil. Apply transfer tape.
Pull both the vinyl and transfer tape off the backing and apply it to the mug.

Then peel off the transfer tape. You are left with your stencil!

Now you are going to use a Sharpie paint pen (found here) and just paint in your stencil. Note: This is not a regular Sharpie! This is an oil based paint pen!!

Once you are all done, peel off the vinyl.
That’s it for that side! Let the paint cure for 72 hours and then bake them (directions at end of post!).
Now you have the option of adding a water slide decal picture to the backside or you could make another stencil of their names and wedding date and paint it with a Sharpie paint pen again. If you’d like to add the water slide decal click here for my tutorial on how to design the picture and apply it!
2nd Method: How to Apply a Water Slide Decal
Print out the file onto water slide decal paper. You can do this easily from a photo app on your PC or in google docs. I print mine on the setting “photo glossy paper” and make sure you print it on the shiny side!
Once you print it out, let it dry and then you are going to spray it with Rustoleum gloss protective enamel so that the ink doesn’t run once you put it into water. If I’ve only cut one decal out, I cut it out first so I don’t waste the whole paper.
Spray a light coat on it and let it dry for 20 to 30 min. Then spray another light coat on it trying to spray a different way than you did before.
Again let dry and spray one more time. (I was working on a different mug so the decals are different!)


Once the decal is completely dry you are going to apply it to your mug. Have a bowl of warm water, a flat paintbrush, some rubbing alcohol, paper towels, and your mug out. Clean your mug where the decal will go with rubbing alcohol.


Then you are going to drop your cut out decal into the water for about 15-30 seconds (Cut it about 1-2 mm from ink if possible).


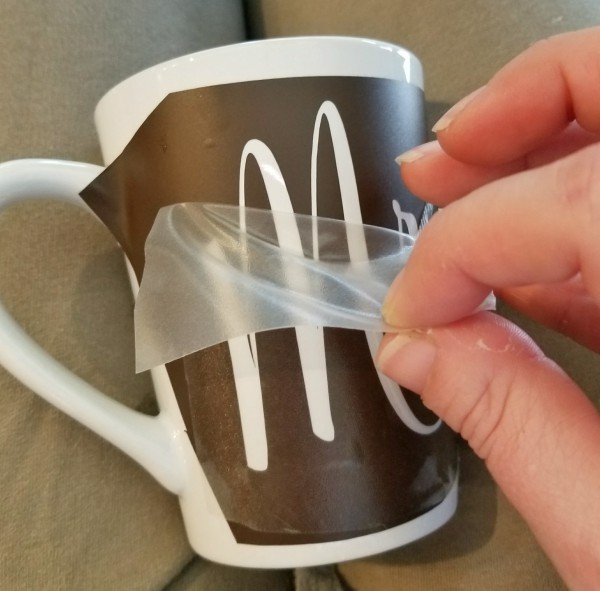
The top clear layer will start to pull away from the paper backing. I put one part on the mug, hold it down with my thumb, and then pull the backing out. (There is a video below if that’s easier for you!)
Then once the backing is off you can move it a little to position it. Then use the paintbrush to wipe it down flat and get the water out from underneath. Then blot it gently with a paper towel.

Here’s a quick video of the whole process. Sorry, it’s off-center!! I was in a different room than my normal videos…eek!


Thanks for stopping by and have a creative day!


Norma Velasquez Gonzales
Friday 10th of January 2020
Beautiful...What font is the Mr and Mrs in the picture? Attempting to make an additional piece for my son and his bride?
Leap of Faith Crafting
Tuesday 14th of January 2020
Hi Norma! I think I finally found it out. It's Truelike. Hope that helps!
Bruce Deniger
Wednesday 21st of February 2018
Wow! I dint knew that i could do this without any cutting machine so easily.
Leap of Faith Crafting
Saturday 24th of February 2018
Hi Bruce! Thanks for stopping by! Water slide decals are so fun and easy to use!